Ever watched a kite dance in the wind and wondered how it stays up? It’s not magic. It’s engineering - simple, smart, and built from four key parts: the frame, the sail, the bridle, and the flying line. Skip the fancy terms and you’ll miss how each piece works together. Let’s break it down like you’re holding a kite in your hands for the first time.
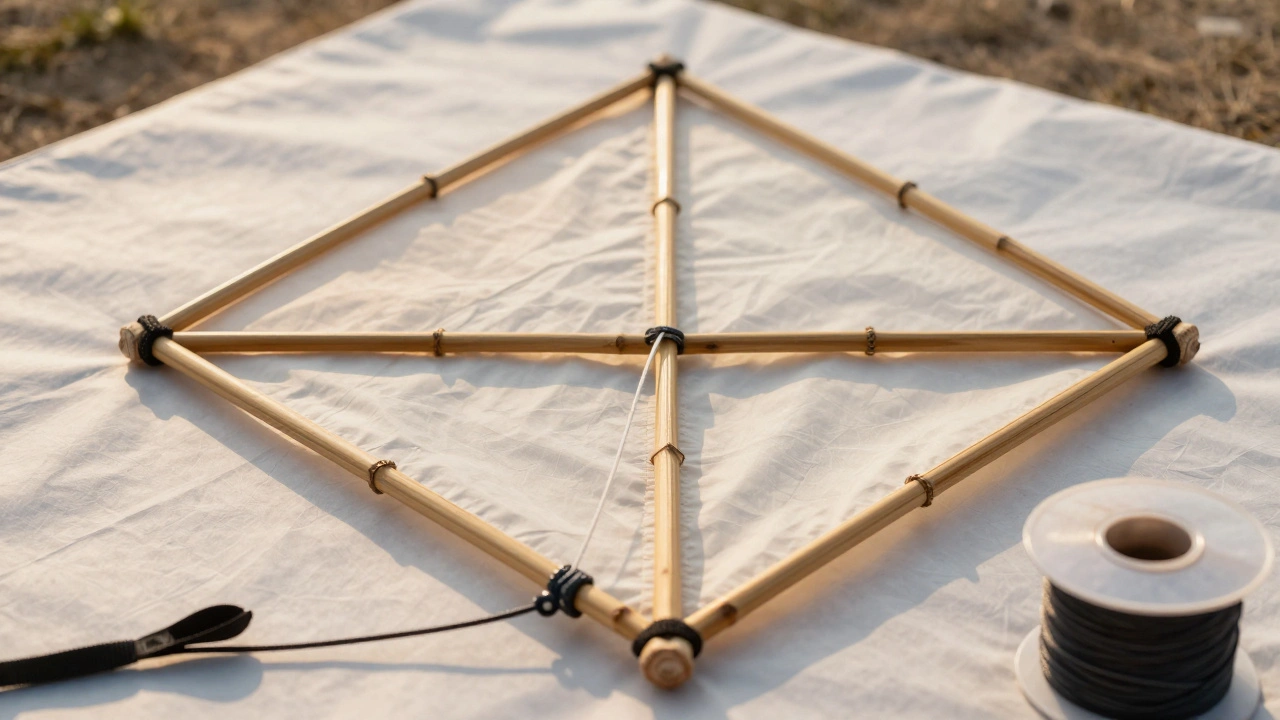
The Frame: The Skeleton That Holds It All Together
The frame is the kite’s backbone. Without it, the sail would just flop around like a wet towel. Most kites use lightweight sticks made from bamboo, fiberglass, or carbon fiber. These are shaped into crosses, diamonds, or triangles - whatever the design needs. The frame’s job? To hold the sail taut and give it the right shape to catch wind.
Think of it like a bicycle wheel. The spokes keep the rim in place. The frame does the same for the sail. A poorly built frame bends in strong wind, twists in a gust, or snaps entirely. That’s why quality matters. A bamboo frame on a child’s kite might last a season. A carbon fiber frame on a performance kite can handle 30 mph winds and still fly straight.
Frame shapes directly affect flight. A diamond frame flies steady in light wind. A delta frame (triangle-shaped) handles stronger winds better. A box kite? That’s four frames stacked - it’s like a wind trap. Each design has trade-offs. Stability vs. speed. Lift vs. maneuverability.
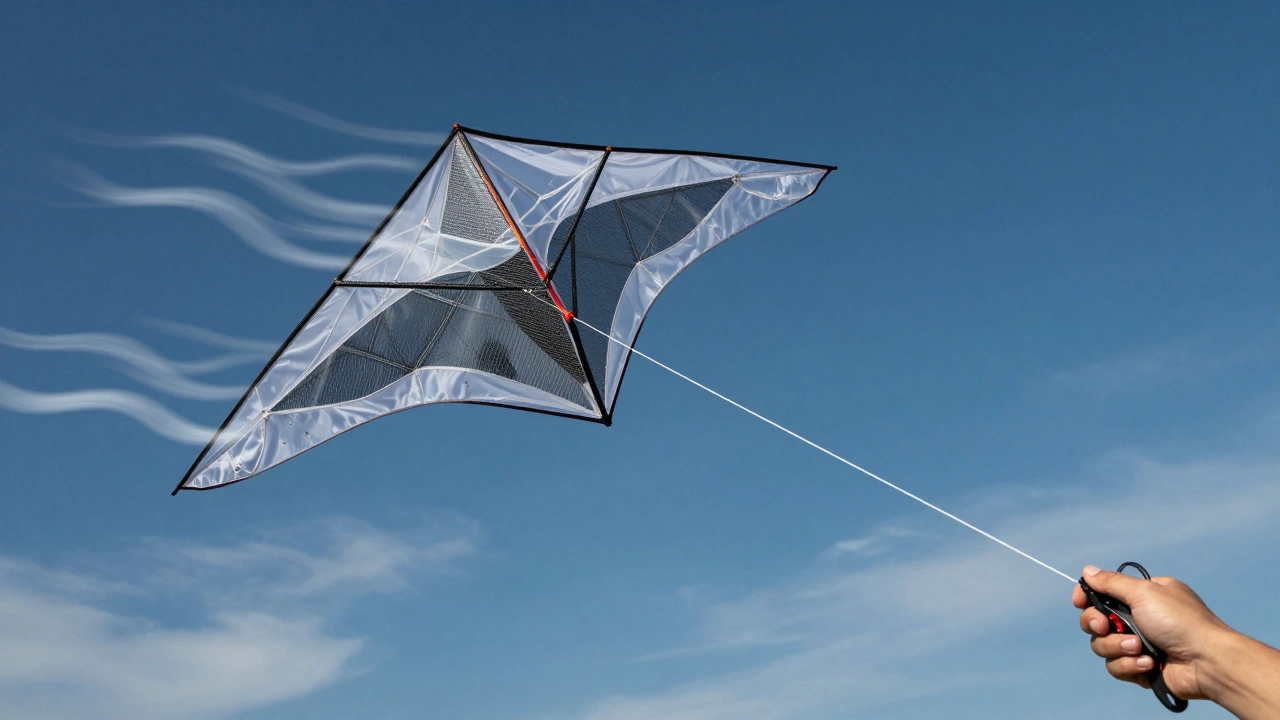
The Sail: The Wind Catcher
The sail is the kite’s skin. It’s usually made from ripstop nylon, polyester, or even paper in traditional designs. This material isn’t chosen for looks - it’s chosen for strength, lightness, and how well it resists tearing. A good sail doesn’t stretch when the wind pulls. It doesn’t flap like a flag. It holds its shape.
Why does shape matter? Because the sail creates lift. Wind flows faster over the curved top side than the flatter bottom. That difference in pressure pushes the kite upward. It’s the same physics as an airplane wing. If the sail is too loose, air slips through. Too tight, and it won’t flex - it’ll crack under pressure. The best sails are cut with slight curves, not flat rectangles.
Color? That’s just for fun. But the material? That’s everything. A cheap plastic sail from a toy store might last one afternoon. A sail made with ripstop polyester can fly for years. You’ll know the difference when your kite doesn’t turn into a pile of tattered fabric after a strong gust.
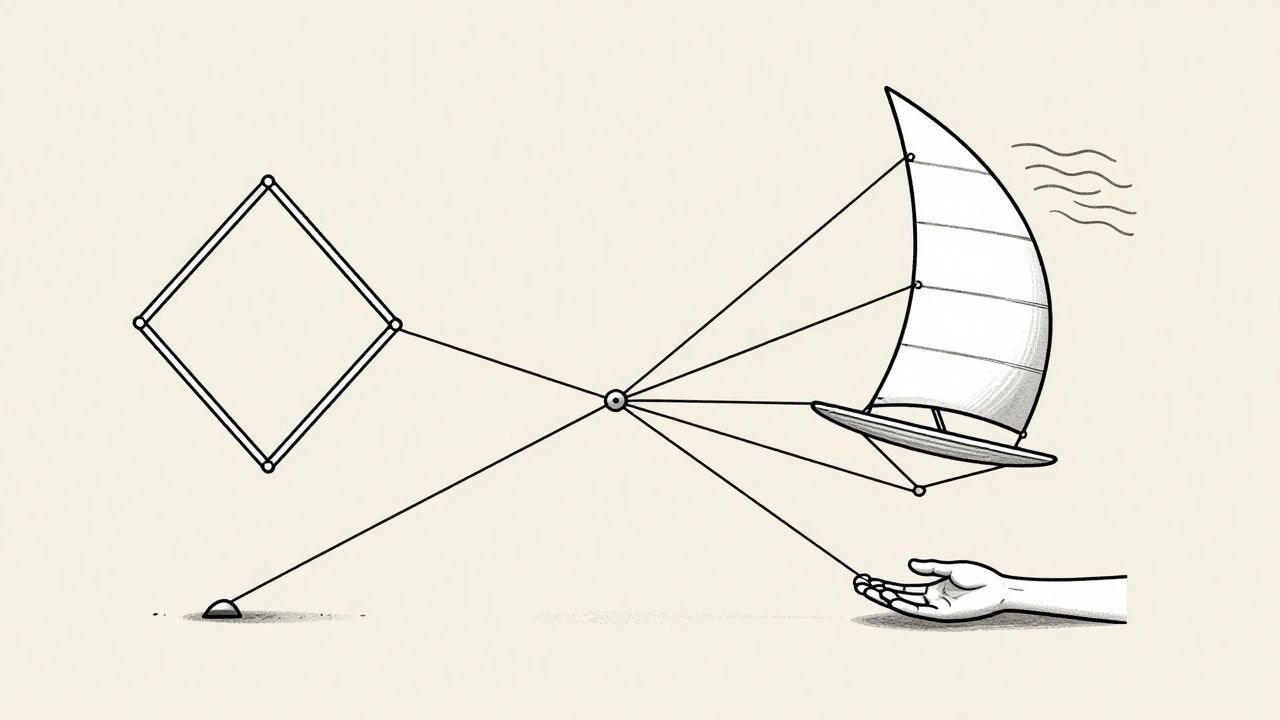
The Bridle: The Control System
The bridle is the kite’s nervous system. It’s a network of strings that connect the frame to the flying line. You don’t see it when the kite’s up, but it’s doing all the work. The bridle determines how the kite angles into the wind. Too short? The kite dives. Too long? It stalls and spins.
Most simple kites have a two-point bridle: one point near the top, one near the bottom. The flying line attaches to a knot or ring between them. Adjusting where that knot sits changes the kite’s behavior. Move it up a little, and the kite pulls harder. Move it down, and it flies more lazily. That’s how you tune it.
Complex kites - like sport kites or delta wings - use multi-point bridles with three, four, even six attachment points. These let pilots steer the kite left and right, loop it, or hover in place. It’s like having a steering wheel for the sky.
Here’s a trick: if your kite keeps spinning or diving, check the bridle. More than half of all kite problems come from a misadjusted bridle. Tie the flying line to the wrong spot, and even the best sail and frame won’t help.
The Flying Line: The Tether to Earth
The flying line is the only thing keeping you connected to the sky. It’s usually made from Dacron, Kevlar, or braided polyester. Dacron is stretchy and forgiving - great for beginners. Kevlar is strong, thin, and doesn’t stretch. That’s why it’s used for high-performance kites. But it’s dangerous if it snaps - it can cut skin.
Thickness matters. A thin line (like 20 lb test) works fine for small kites. A large stunt kite? You’ll need 50 lb or even 100 lb test. Too thin, and the line breaks. Too thick, and it drags through the air, making the kite sluggish.
Length? Most beginners start with 100 to 200 feet. Longer lines let the kite fly higher, but they’re harder to control. Wind speed also affects line choice. In gusty conditions, a slightly heavier line absorbs shocks better. In calm winds, a lighter line lets the kite respond quicker.
And don’t forget the reel. A simple cardboard reel works. A spinning reel with a brake? Better. A handle with a line cutter? Essential if you’re flying near trees or power lines. Always keep a spare line on hand. They break. Always.
How the Parts Work Together
None of these parts work alone. The frame gives shape. The sail catches wind. The bridle angles the kite into the breeze. The flying line transmits your control - and your pull - to the whole system.
Imagine a kite with a perfect frame and sail but a broken bridle. It’ll spin in circles. A kite with a great bridle and line but a flimsy frame? It’ll collapse. A kite with all the right parts but the wrong line? It’ll either snap or refuse to climb.
That’s why tuning a kite isn’t about buying the fanciest one. It’s about balancing the four elements. A good kite isn’t expensive. It’s well-made. And it’s adjusted for the wind you’re flying in.
Real-World Fixes: What to Do When Things Go Wrong
- Spinning in circles? Your bridle is unbalanced. Check if one side is tighter than the other. Adjust the knot position.
- Can’t get off the ground? Your sail might be too loose, or your bridle is too low. Try moving the flying line attachment point higher.
- Line keeps snapping? You’re using a line that’s too thin for the wind. Switch to a heavier test. Also, check for frayed edges on your reel.
- Kite dives suddenly? Wind gusts hit. Your bridle might be too short. Lengthen it slightly, or switch to a kite designed for stronger winds.
Most problems are simple fixes. You don’t need tools. Just your hands, a little patience, and a clear head.
What to Look for When Buying or Building a Kite
- Frame: Look for smooth joints. No cracks. Flexible but not floppy.
- Sail: Should feel tight when held. No wrinkles. Look for reinforced edges.
- Bridle: Should have adjustable knots or rings. Avoid glued-on lines - they can’t be tuned.
- Flying line: Should be labeled with test strength. Avoid frayed or tangled lines.
Don’t buy a kite based on color. Buy it based on how well its parts are made. A $10 kite with a carbon frame and ripstop sail will outfly a $30 one with plastic sticks and a paper sail every time.
What’s the most important part of a kite?
The bridle. It’s the only part that controls how the kite interacts with the wind. Even the best frame and sail will fly poorly if the bridle is wrong. Most people overlook it, but adjusting the bridle is how you turn a good kite into a great one.
Can I use any string to fly a kite?
No. Regular string, yarn, or fishing line won’t hold up. Kite line is specially designed to be strong, low-stretch, and smooth. Fishing line can cut your hands. Yarn tangles. Use line labeled for kites - it’s cheap and worth it.
Why does my kite nose-dive in strong wind?
The bridle is too short for the wind strength. In strong wind, the kite needs more angle to stay stable. Move the flying line attachment point lower on the bridle. This lets the kite sit flatter in the wind, reducing the dive. If that doesn’t help, switch to a kite made for high winds.
How do I know if my kite frame is good?
Hold the frame by one end and gently flex it. It should bend slightly and return to shape. If it snaps, cracks, or stays bent, it’s weak. Also, check the joints. They should be tightly tied or glued - no wiggling. A good frame feels solid but not heavy.
Is it better to have a longer or shorter flying line?
It depends. Shorter lines (50-100 ft) give more control and are easier for beginners. Longer lines (200-500 ft) let you fly higher and feel more wind, but they’re harder to manage. If you’re in a small park, go short. If you’re at the beach with open space, go longer.