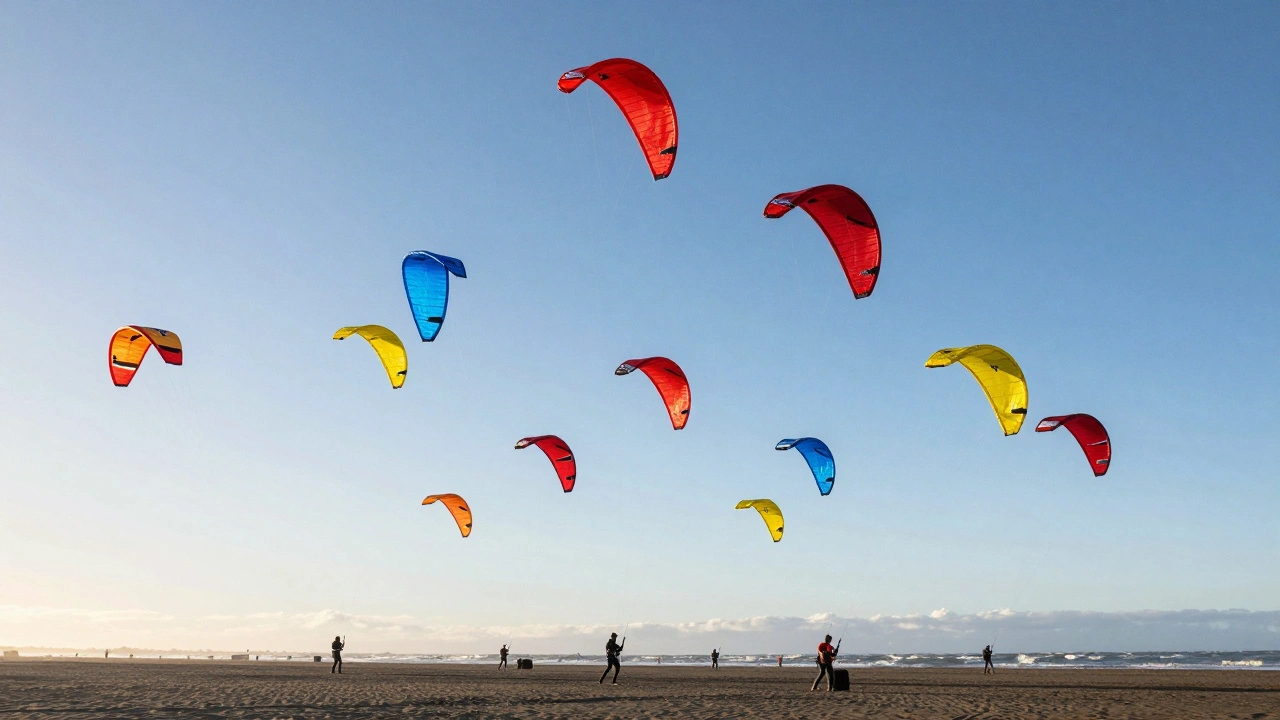
Picture this: a clear blue sky over the Oregon coast. A dozen massive, colorful shapes burst into motion in perfect unison. They don't just fly; they dance. This isn't magic-it's a show kite demonstration, a high-stakes performance where aerodynamics meets artistic expression. If you've ever watched a professional kite team at a festival like the International Kite Festival in Santa Monica or the one in Portland, you know the thrill. But behind those smooth arcs and synchronized turns is a complex web of physics, trust, and rigorous training. Most people think kite flying is a solo hobby. In reality, competitive team flying is closer to synchronized swimming than a backyard picnic. You want to understand how these teams pull off such precision? It comes down to three non-negotiable pillars: choreography that respects the wind, anchors that hold firm under tension, and teamwork that operates without words. Let’s break down exactly how professionals turn simple nylon triangles into aerial art.
The Physics of Choreography: Dancing with the Wind
Choreography in kite flying isn't about drawing lines in the air. It's about managing energy. When a team flies six or eight large delta kites simultaneously, every movement creates drag, lift, and turbulence. If Pilot A makes a sharp turn while Pilot B is gliding, the airflow disrupts the entire formation. The result? Chaos.
Professional choreographers design routines based on wind vectors, not just music beats. They use a concept called "wind window mapping." Imagine the sky as a clock face relative to the wind direction. Upwind is 12 o'clock, directly overhead is 6 o'clock. Every maneuver must account for where the kite sits in this window.
- Synchronization: Moves are timed to the second. A "cross" pattern requires all pilots to initiate their turn within a 0.5-second window. Any delay causes visual disarray.
- Spacing: Kites need buffer zones. In a tight V-formation, trailing kites must stay outside the turbulent wake of the lead kite. Typically, this means maintaining a minimum distance of two wingspans between each flyer.
- Wind Adaptation: Good choreography has "fallback moves." If the gusts pick up unexpectedly, the routine shifts from delicate loops to broad, stable arcs. You can't force a kite into a spin if the wind drops below 8 mph.
I’ve seen teams fail because they tried to execute a complex figure-eight routine in choppy winds. The kites stalled, tangled lines, and the show ended prematurely. The best choreographers treat the wind as a partner, not an obstacle. They build flexibility into the script so the team can adapt on the fly-literally.
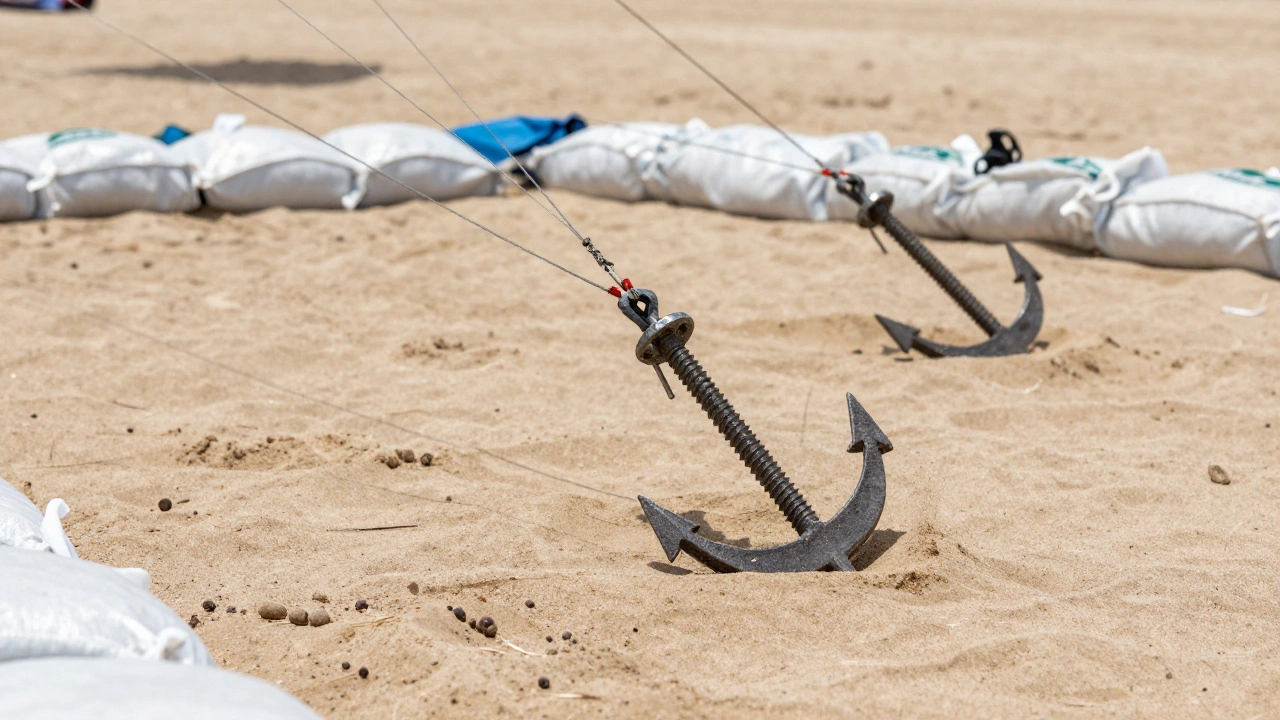
Anchors: The Invisible Foundation
You might think anchors are only for static display kites. Wrong. Even in dynamic show flights, stability starts from the ground. When multiple large kites pull against the wind, the total load can exceed several hundred pounds of force. Without proper anchoring, your pilot gets dragged backward, losing control of the stick.
In professional settings, we rarely rely on simple stakes. Instead, we use a combination of ground anchors and mechanical advantage systems.
| Anchor Type | Best For | Load Capacity | Setup Time |
|---|---|---|---|
| Screw-in Earth Anchors | Hard-packed sand or dry soil | Up to 200 lbs | 5 minutes |
| Vehicle Winches | High-wind coastal events | Unlimited (vehicle dependent) | 15 minutes |
| Sandbag Arrays | Grass fields or soft terrain | 150-300 lbs | 10 minutes |
The key insight here is redundancy. Professional teams never rely on a single anchor point for a multi-kite rig. We use a triangular distribution of anchors to distribute the load evenly. This prevents any single stake from ripping out during a sudden gust. Also, consider the line material. Spectra or Dyneema lines are standard because they stretch minimally. Stretchy lines absorb shock but reduce control precision. For choreography, you want instant response, which means low-stretch lines anchored securely to the ground.
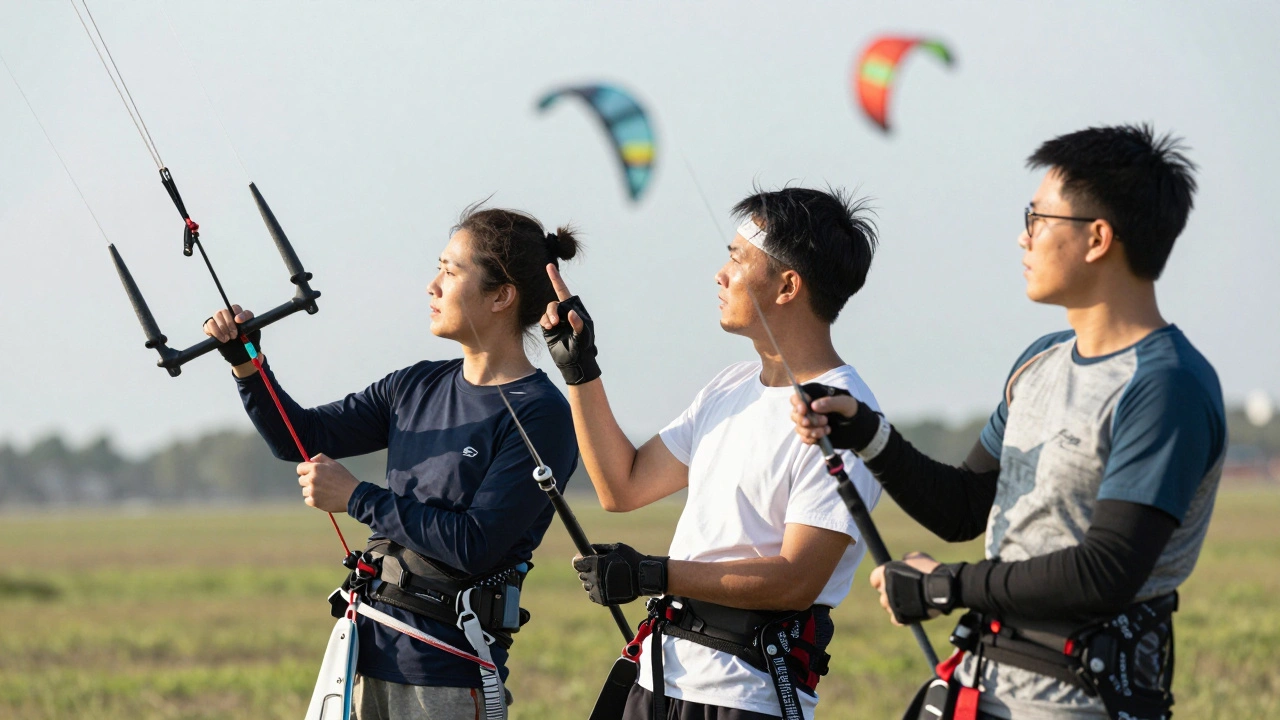
Teamwork: The Silent Language of Pilots
This is the hardest part to teach. You can buy the best kites and learn the best knots, but if your team doesn't communicate, you'll crash. In a show environment, there’s no time for shouting instructions. The wind noise, crowd chatter, and distance between pilots make verbal communication nearly impossible.
Teams develop a "silent language" based on hand signals and eye contact. Before every show, pilots spend hours drilling basic maneuvers until they become muscle memory. Here’s what that looks like in practice:
- The Count-In: One designated leader counts down via radio or visible hand signal. Everyone initiates their move on the same beat.
- Visual Cues: Pilots watch each other’s shoulder movements. A slight tilt indicates an incoming turn. This allows real-time adjustment without looking away from the sky.
- Error Recovery: What happens when one pilot messes up? The rest of the team doesn’t stop. They continue the routine while the errant pilot recovers gracefully. Stopping breaks the flow and draws attention to the mistake. Continuing masks it.
Trust is critical. You have to believe your teammate won’t fly into your space. This requires knowing their style intimately. Some pilots are aggressive; others are conservative. A balanced mix works best. Too many aggressive pilots lead to collisions; too many conservative ones result in a lackluster show.
We also debrief after every flight. No blame, just analysis. "Why did Kite 3 lag behind?" "Was it wind shear or pilot hesitation?" These post-show reviews refine the next performance. It’s iterative improvement, much like software development or athletic training.
Equipment Essentials for Show Teams
Your gear matters more than you think. While choreography and teamwork are skills, equipment enables them. Here’s what separates amateur flyers from pros:
- Kite Design: Delta kites are the workhorses of show flying. Their stability and ease of control make them ideal for formations. Look for models with reinforced leading edges and durable sailcloth.
- Control Bars: Ergonomic bars reduce fatigue. Flying for 20 minutes straight requires sustained grip strength. Cheap plastic bars cause hand cramps, leading to shaky controls.
- Line Management: Tangles are the enemy. Use color-coded lines (e.g., red for left, blue for right) to prevent confusion during quick maneuvers. Line clips help organize spools on the ground.
- Wind Meters: Accurate data is crucial. Anemometers give precise readings, helping pilots decide whether to launch or wait. Guessing wind speed leads to poor decisions.
Investing in quality gear pays off. A $50 kite might look fine initially, but it will tear under stress. Professional-grade kites withstand repeated launches and landings. They’re built to last through dozens of festivals.
Common Pitfalls to Avoid
Even experienced teams make mistakes. Here are the most common errors I see at local competitions:
- Ignoring Wind Shifts: Winds change direction throughout the day. A routine designed for morning breezes may fail in the afternoon heat. Always check conditions before launching.
- Overcomplicating Routines: Simple moves executed perfectly beat complex moves done poorly. Start with basic patterns like circles and crosses before attempting flips or spins.
- Poor Ground Crew Coordination: Your ground crew handles lines, anchors, and safety. If they’re disorganized, the pilots suffer. Assign specific roles and rehearse them separately.
- Lack of Warm-Up: Just like athletes, pilots need to warm up. Practice basic maneuvers for 10 minutes before the show to sync timing and feel the wind.
Avoiding these pitfalls keeps your team safe and your show impressive. Remember, consistency builds reputation. Audiences remember smooth performances, not flashy failures.
Getting Started: Your First Team Flight
Ready to try team flying? Start small. Gather two friends and two identical kites. Choose a flat, open field with steady wind (10-15 mph). Begin with simple synchronization exercises:
- Launch Together: Stand side-by-side. Launch simultaneously. Keep kites at the same height.
- Mirror Moves: One pilot leads; the other mirrors. Switch roles after five minutes.
- Cross Patterns: Fly toward each other, then cross paths without colliding. Practice this repeatedly until it feels natural.
As you gain confidence, add more kites and complexity. Join local kite clubs-they offer valuable feedback and community support. Attend festivals as spectators first. Watch how pros handle wind changes and recover from errors. Learn by observing.
Finally, embrace failure. Every team crashes sometimes. What matters is how you respond. Laugh it off, analyze the cause, and try again. That’s the spirit of kite flying.
What size kites are best for show demonstrations?
Medium-sized delta kites, typically 4-6 feet wide, are ideal. They offer enough visibility for audiences while remaining manageable for pilots. Larger kites require stronger winds and more skill to control precisely.
How do teams handle wind lulls during a performance?
Teams pause briefly or transition to low-energy moves like gentle glides. Experienced pilots anticipate lulls and adjust their altitude to catch rising air currents. Flexibility in choreography is key.
Can beginners join professional show teams?
Yes, but only after mastering basic solo flying. Teams value reliability over raw talent. Beginners should practice synchronization drills extensively before joining formal shows.
What safety gear is essential for team flying?
Gloves protect hands from line friction. Sunglasses reduce glare. Closed-toe shoes prevent foot injuries. Additionally, carry a first-aid kit and ensure all participants know emergency protocols.
Where can I find resources to learn team choreography?
Online forums, YouTube tutorials, and local kite clubs offer great starting points. Many organizations publish free guides on synchronization techniques. Attending workshops provides hands-on experience.