There is nothing worse than watching your favorite kite tear apart just as the wind picks up. It’s a moment every pilot knows well. You step out into a perfect breeze, only to find that months of neglect have left your gear vulnerable. The fabric snaps, the lines fray, or the bar feels loose in your hands. This isn’t just bad luck; it’s a lack of seasonal maintenance.
Living in Portland, Oregon, I’ve seen how quickly weather shifts can ruin equipment if you aren’t ready. One minute it’s sunny and dry, the next it’s raining sideways with gusts that test every seam. Preparing your kites for different weather conditions isn’t about fixing things after they break. It’s about proactive care that extends the life of your gear and keeps you safe on the water.
Why Seasonal Checks Matter More Than You Think
Most pilots wait until something breaks to look at their kite. By then, small issues have often become big problems. A tiny hole in the canopy can expand rapidly under high pressure. A frayed line can snap without warning. Regular checks prevent these disasters before they happen.
Kites are complex machines made of lightweight materials designed to handle immense forces. They aren’t built to last forever without care. The stress from launching, landing, and riding in varying winds takes a toll. Ignoring this wear leads to costly repairs or total replacement. Proper maintenance saves money and ensures your safety.
Think of your kite like a car. You wouldn’t drive a car for years without checking the oil or tires. Your kite needs similar attention. Seasonal maintenance means inspecting your gear at the start and end of each riding season, plus quick checks before every session.
Inspecting the Canopy: Fabric and Seams
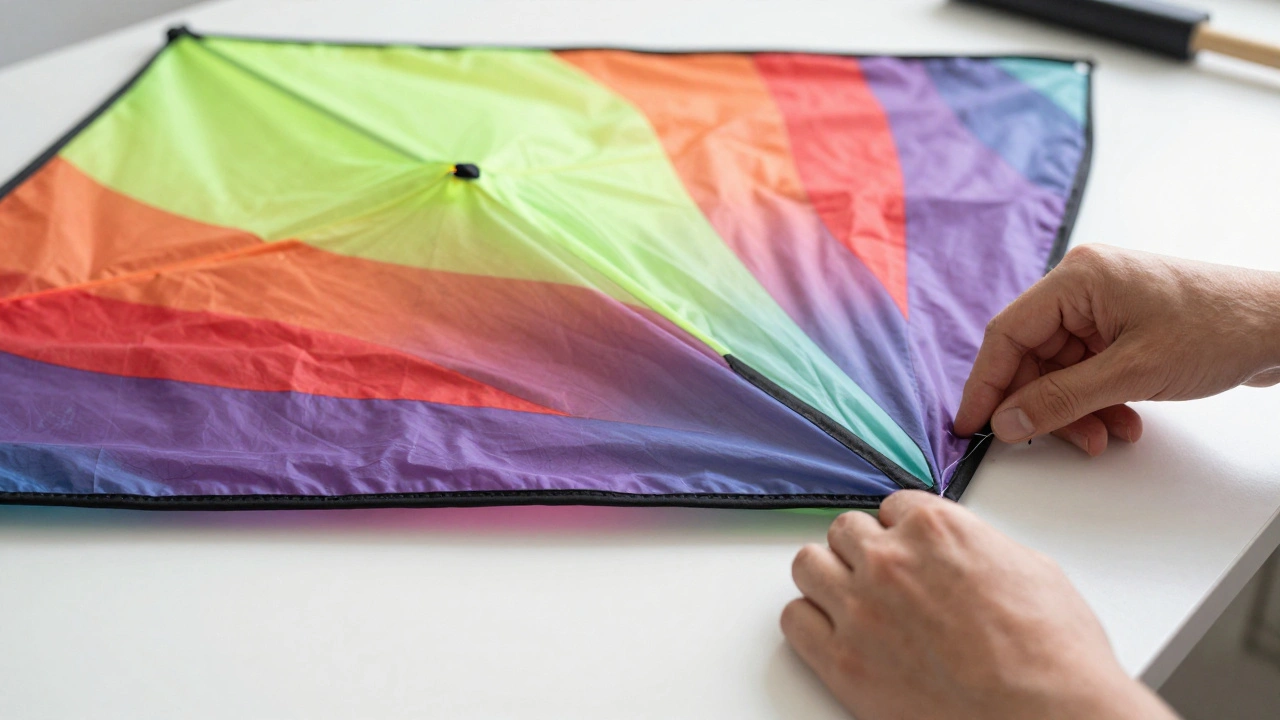
The canopy is the heart of your kite. It catches the wind and generates power. If the fabric is compromised, performance drops and risk rises. Start by laying the kite flat on a clean surface. Look for tears, holes, or thin spots in the material.
- Check the seams: Run your fingers along all stitched areas. Loose threads or splitting stitches indicate weak points. Reinforce any loose seams immediately with kite-specific tape or professional repair.
- Look for UV damage: Sun exposure degrades fabric over time. Faded colors or brittle texture signal UV wear. This makes the material prone to tearing.
- Inspect leading edges: These areas take the most abuse during launches and landings. Check for abrasion marks or punctures from sand and debris.
If you find small holes, patch them right away. Use high-quality repair patches designed for your kite’s material. Don’t use household duct tape-it leaves residue and fails under tension. Small fixes now prevent catastrophic failures later.
Lines and Connectors: The Lifeline of Safety
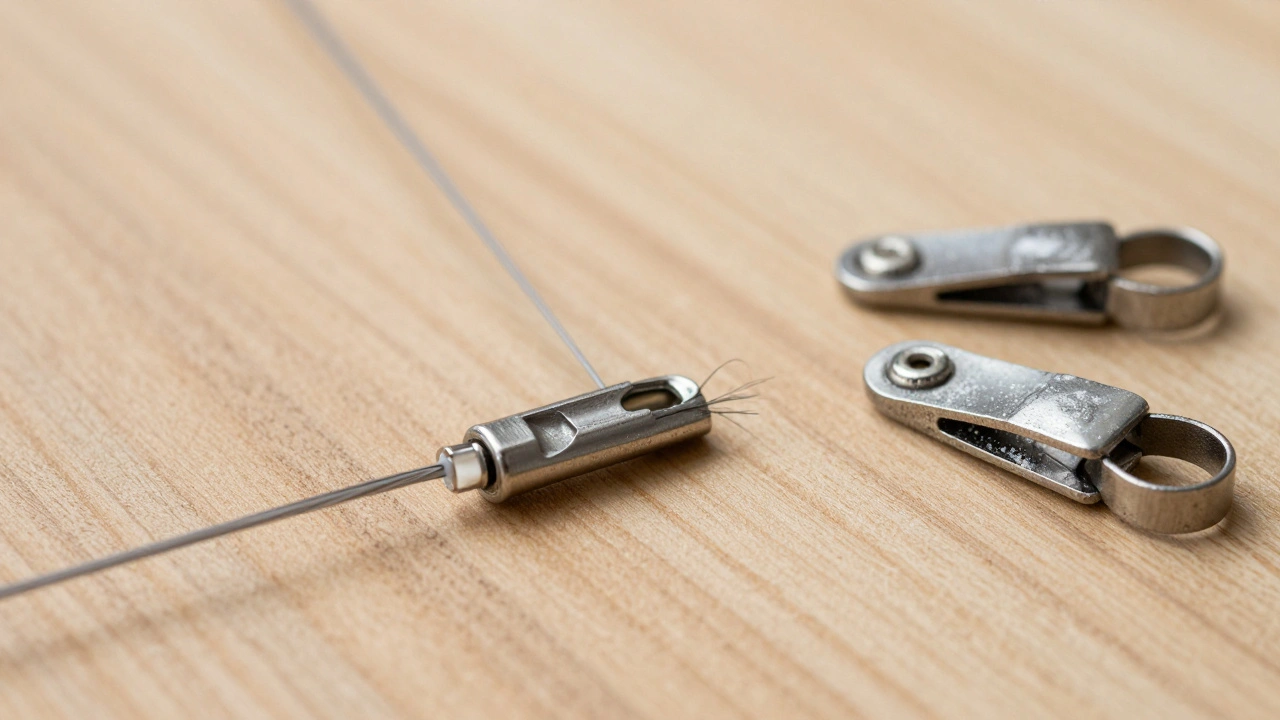
Your lines connect you to the kite. They transmit control and power. Frayed or damaged lines are dangerous. They can snap unexpectedly, causing loss of control or injury. Inspect your lines thoroughly every season.
- Examine the ends: Check where the lines attach to the kite and your control bar. Look for unraveling fibers or worn sheaths.
- Run a hand down the length: Feel for bumps, knots, or stiff sections. These indicate internal damage or moisture intrusion.
- Check connectors: Ensure swivels and clips move freely. Lubricate them if they feel sticky. Replace any corroded or bent metal parts.
Saltwater accelerates corrosion and fiber degradation. Rinse your lines with fresh water after every session in the ocean. Never store wet lines. Moisture breeds mold and weakens nylon or Dyneema fibers. Dry lines completely before coiling them up.
| Issue | Cause | Solution |
|---|---|---|
| Frayed Ends | Wear from friction | Re-splice or replace lines |
| Stiff Sections | Moisture or dirt buildup | Rinse and dry thoroughly |
| Corroded Connectors | Saltwater exposure | Replace hardware immediately |
| Uneven Tension | Stretching over time | Adjust trim settings or check bar |
Control Bar Care: Precision Under Pressure
The control bar is your interface with the kite. It sends commands to change direction and power. A sticky or loose bar compromises control. Inspect the bar mechanism regularly.
Check the depower system. Pull the chicken loop and ensure it releases smoothly. Stiff springs or jammed cables can delay response in critical moments. Clean the bar with fresh water to remove salt and sand. Avoid using harsh chemicals that degrade plastics and rubbers.
Inspect the handles and straps. Worn grips reduce comfort and control. Replace cracked or stretched components. Ensure all screws and bolts are tight but not overtightened, which can strip threads.
Pump and Valve Maintenance
A good pump makes inflation easy and consistent. A faulty valve leaks air slowly, making setup frustrating. Check your pump hose for cracks. Ensure the connector fits snugly onto the kite’s valve.
Clean the valve area on the kite. Sand and grit can damage the seal. Use a soft brush to remove debris. If the valve leaks, try tightening it first. If that fails, consider replacing the valve core or consulting a repair specialist.
Store your pump indoors. Extreme temperatures can damage seals and mechanisms. Keep it away from direct sunlight to prevent plastic brittleness.
Storage Strategies for Longevity
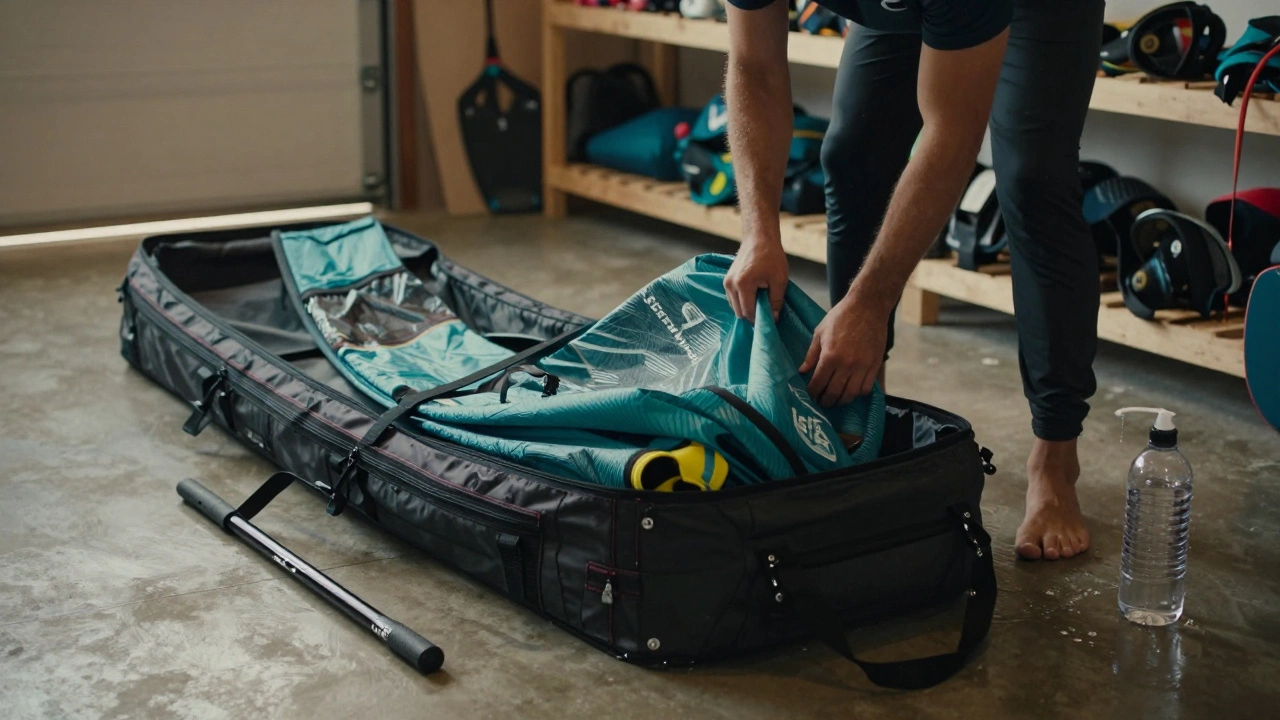
How you store your gear matters as much as how you ride it. Poor storage leads to mold, mildew, and material degradation. Always rinse your kite with fresh water after use, especially in saltwater environments.
Dry everything completely before packing. Fold the canopy loosely to avoid creasing. Store it in a cool, dry place away from direct sunlight. Avoid leaving your kite in a hot car trunk-heat accelerates UV damage and weakens adhesives.
Use a dedicated bag for storage. Stuffing your kite into a random sack risks snagging and tearing. Invest in a quality bag with compartments for lines, bar, and pump. This keeps everything organized and protected.
Weather-Specific Preparations
Different weather conditions demand specific preparations. Adjust your routine based on forecasted elements.
- High Winds: Check for extra reinforcement on leading edges. Ensure lines are rated for higher loads. Consider switching to a smaller kite size for better control.
- Rain: Waterproof your electronics if using a foil kite. Ensure drainage holes are clear. Dry thoroughly after use to prevent mold.
- Cold Temperatures: Materials become stiff in cold weather. Warm up your gear before inflating. Check for brittleness in fabrics and plastics.
- Sand and Dust: Rinse off sand immediately. It acts like sandpaper on moving parts. Cover your gear when not in use to minimize exposure.
Being prepared for specific conditions reduces unexpected failures. It also enhances your enjoyment by ensuring smooth operation regardless of the environment.
When to Seek Professional Help
Some repairs require expert skills. Attempting complex fixes yourself can void warranties or cause further damage. Know when to call a professional.
Major structural repairs, such as large tears or frame replacements, should be handled by certified technicians. They have specialized tools and materials for durable fixes. If you’re unsure about a repair, consult a local shop. Their expertise ensures your kite remains safe and functional.
Regular professional inspections annually can catch hidden issues. Technicians can spot weaknesses invisible to the untrained eye. This preventive approach saves money and extends gear lifespan significantly.
How often should I inspect my kite?
You should perform a thorough inspection at the start and end of each riding season. Additionally, do a quick visual check before every session. Look for obvious signs of wear like fraying lines or torn fabric. Catching issues early prevents bigger problems later.
Can I repair a torn kite myself?
Small tears can be repaired with high-quality kite patches. Follow the manufacturer’s instructions carefully. For larger tears or structural damage, seek professional help. Improper repairs can compromise safety and performance.
What causes kite lines to fray?
Fraying is caused by friction against rough surfaces, UV exposure, and saltwater corrosion. Regular rinsing and proper storage reduce wear. Inspect lines frequently and replace them if you notice significant fraying or stiffness.
How does UV damage affect kite fabric?
UV rays break down the chemical bonds in fabric, making it brittle and prone to tearing. Prolonged sun exposure fades colors and weakens seams. Store your kite away from direct sunlight to minimize UV damage.
Is it safe to use old kite lines?
Only if they pass rigorous inspection. Look for fraying, discoloration, or stiffness. If in doubt, replace them. Old lines may have hidden internal damage that isn’t visible. Safety should always come first.
How should I store my kite during winter?
Clean and dry your kite thoroughly. Store it in a cool, dry place away from sunlight. Avoid folding it tightly to prevent creases. Use a dedicated bag to protect it from dust and pests. Check it occasionally for signs of mold or pests.
What type of tape should I use for kite repairs?
Use specialized kite repair tape or patches designed for your kite’s material. Household duct tape leaves residue and fails under tension. Quality repair kits provide strong, flexible bonds that withstand wind pressure.
Can saltwater damage my control bar?
Yes, saltwater corrodes metal parts and degrades plastics. Rinse your bar with fresh water after every session. Dry it completely before storage. Regular maintenance prevents rust and ensures smooth operation.