Ever stood on a windy hillside with a kite in your hands, ready to fly-but felt that gut-clenching fear of losing control? You’re not alone. Solo kite flying is one of the most peaceful ways to connect with the wind, but it’s also one of the most dangerous if you don’t know how to launch and land safely. Too many kite flyers end up tangled in lines, dragged across grass, or worse-watching their kite vanish into a tree or power line. The truth? You don’t need a team or a crowd to fly well. You just need the right techniques.
Why Solo Kite Flying Is Different
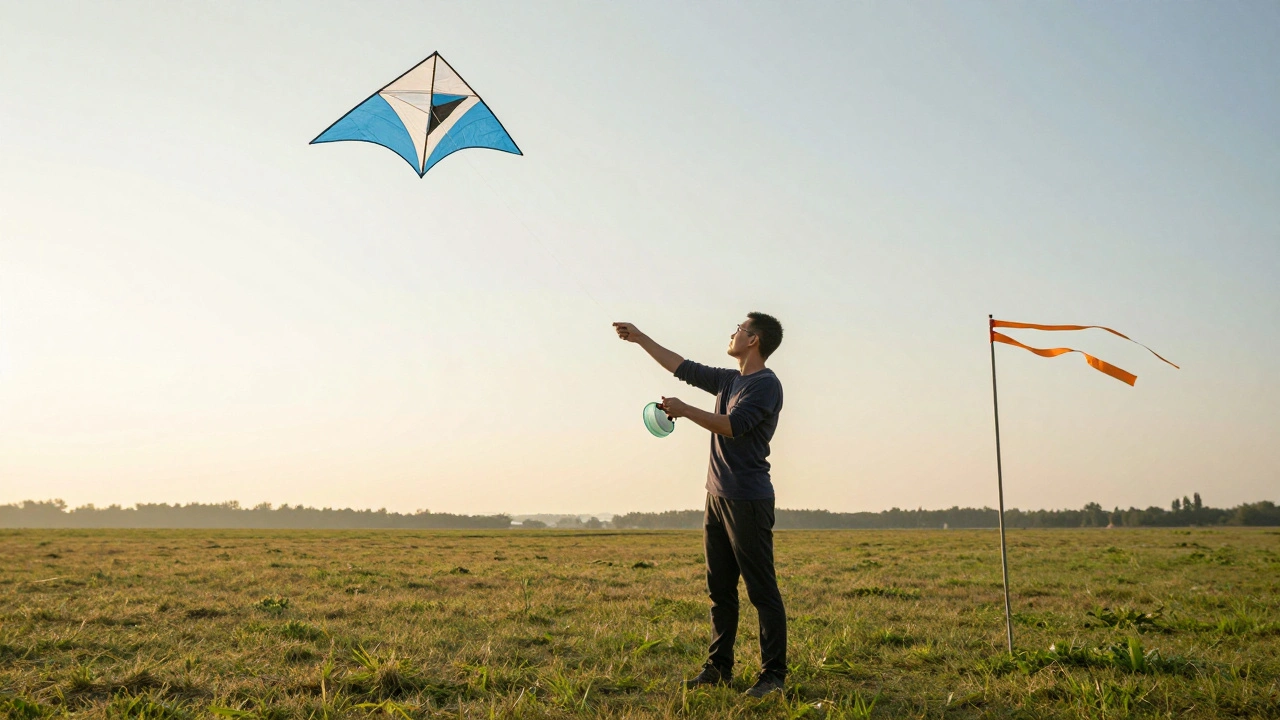
Group kite flying has rules: someone holds the line, someone checks the wind, someone yells “Go!” Solo flying means you’re the pilot, the ground crew, and the safety officer-all at once. That’s why the standard launch methods you see in videos often won’t work for you. Those tricks rely on two people, a helper, or a launch pad. When you’re alone, you need systems that give you control from the moment the kite leaves your hands.
Most beginner guides skip this. They show you how to run with a kite in 20 mph winds and call it “fun.” But in reality, that’s how most kite crashes happen. The wind picks up. The kite surges. You lose balance. The line snaps taut. And suddenly, you’re chasing a $300 kite through a thicket of bushes. Safe solo flying isn’t about bravery-it’s about patience and preparation.
Step-by-Step: The Controlled Launch
Forget running. Forget tossing. Here’s what actually works for solo flyers:
- Check your wind zone. Use a wind meter app or a simple ribbon tied to a stick. You need 8-15 mph. Anything under 6 mph won’t lift your kite. Anything over 18 mph is risky without experience. Portland’s spring winds? Perfect-steady, not gusty.
- Set up your line spool. Never hold the line bare-handed. Use a line winder with a brake. Even a simple plastic reel with a thumb lock helps. If your line slips, you lose control.
- Position your kite. Lay the kite flat on the ground, nose pointed into the wind. Make sure the bridle is untangled. The tail (if you have one) should hang straight down.
- Hold the launch line. Grip the winder with both hands, arms slightly bent. Step back slowly until the line is taut but not tight. Don’t yank.
- Let the wind do the work. Wait. Breathe. Watch the kite. If the leading edge starts to flutter, that’s your cue. Gently release pressure on the brake. Don’t pull. Just let go. The kite will rise on its own. If it wobbles, pause. Wait for stability. Then ease out more line.
This method works because it removes human error. You’re not forcing lift-you’re letting the wind find its balance. The kite will rise smoothly, like a bird testing its wings. No running. No shouting. No panic.
Mastering the Controlled Landing
Landing is where most solo flyers mess up. They think, “I’ll just let it come down.” That’s how kites end up in power lines, rooftops, or lakes.
Here’s the real trick: land into the wind. Always. Always. Always.
- When you’re ready to land, slowly reel in line-no more than 1-2 feet per second.
- As the kite drops lower, steer it slightly sideways using small tugs on the lines. This slows its descent and keeps it from flipping.
- Once it’s within 10 feet of the ground, stop reeling. Let it drift. The wind will carry it gently to the surface.
- Don’t chase it. Don’t reach for it. Wait. If it lands on its back, gently pull one line to flip it upright. If it lands on its nose, let it sit. The wind will right it.
Why does this work? Kites are designed to glide. They don’t fall-they float. If you try to yank it down, you’re fighting physics. If you let it slow naturally, it lands like a leaf.
Tools That Make Solo Flying Safer
You don’t need fancy gear, but a few simple tools change everything:
- Line brake reel: A plastic or metal spool with a thumb brake. Brands like Prism or WINDSWEPT offer reliable models under $40.
- Wind indicator: A 3-foot ribbon on a stick. If it’s flat, wind’s too light. If it’s flapping hard, it’s time to land.
- Line cutter: A small, sharp blade on a lanyard. Tangled in a tree? Cut the line, not your fingers.
- Weather app with wind alerts: Windy.com or Windfinder show real-time gusts. Avoid flying if gusts exceed 5 mph above your kite’s max rating.
One solo flyer in Eugene, Oregon, lost a $500 stunt kite last year because he didn’t use a line cutter. He climbed a tree. Got stuck. Called 911. The fire department had to cut him down. Don’t be that person.
What Not to Do
Here are the three most common mistakes-and how to avoid them:
- Launching in gusty wind. If the grass is dancing wildly, don’t fly. Gusty wind makes kites unpredictable. Wait for steady flow.
- Using too much line. Beginners think longer line = more control. Wrong. Long lines mean delayed reactions. Start with 100 feet. Only extend when you’re confident.
- Flying near obstacles. Trees, power lines, buildings, and people are not safe zones. Keep at least 300 feet from anything that could snag your kite or your line.
One of the most dangerous myths is that “small kites are safer.” A 3-foot delta kite in 20 mph wind can still drag you into a fence. Weight and size don’t matter-it’s the wind force that counts.
Practice Drills for Confidence
Want to get better? Try these drills on quiet afternoons:
- The 10-Second Hover: Launch, then reel in just enough to hold the kite at 20 feet. Hold it there for 10 seconds without moving. This teaches line tension control.
- The Slow Circle: Let the kite fly out 150 feet. Then, gently pull one line to make it circle slowly. Do 3 full circles. This builds steering feel.
- The Blind Landing: Launch, then close your eyes. Listen to the wind. Use the sound of the line to judge height and direction. Land it by feel. This sharpens your instincts.
Do one drill per session. Ten minutes a day for two weeks? You’ll fly like a pro.
When to Walk Away
Not every day is a flying day. Here’s your quick checklist to decide:
- Wind speed over 20 mph? Walk away.
- Clouds rolling in fast? Walk away.
- People nearby? Walk away.
- Line feels stiff or tangled? Walk away.
- Feeling rushed or stressed? Walk away.
There’s no shame in walking away. The wind will be there tomorrow. Your kite won’t survive a 50-foot fall into concrete.
Can I fly a kite alone if I’ve never done it before?
Yes-but only with a beginner kite designed for solo use. Look for kites labeled “easy launch” or “stable for solo flyers.” Avoid stunt kites, delta kites with tails, or anything over 4 feet wide. Start with a simple diamond kite under $30. Practice in an open field with no obstacles. Never try your first flight on a windy hill.
What if my kite gets stuck in a tree?
Don’t climb. Don’t shake the tree. Don’t use a stick. Use your line cutter. Cut the line near the winder, then retrieve the kite later when the wind dies down. Most trees release kites naturally after a few hours. If it’s too high, wait for a professional tree service. Your kite is replaceable. Your safety isn’t.
Is it safe to fly near roads or parks?
No. Kite lines are nearly invisible and can snap at 100+ pounds of tension. They’ve cut through bike spokes, wrapped around children’s necks, and tangled with power lines. Always fly in open fields, beaches, or large parks with no foot traffic. If people are walking nearby, move at least 200 feet away. It’s not just about your safety-it’s about theirs.
How do I know if my kite is too strong for the wind?
If the kite pulls hard enough to yank the winder from your hands, or if the line vibrates like a guitar string, it’s overpowered. Most kites list a wind range on the box. If you’re in the upper limit, land. A kite that’s too strong for the wind doesn’t fly better-it becomes a hazard. It’s not about power-it’s about control.
Can I fly at night?
Only with certified LED kites designed for night flying. Never fly a regular kite after dark. You won’t see the line. You won’t see obstacles. And you won’t see other people. Night flying is a specialized skill that requires training, lights, and permits in most places. Stick to daylight until you’ve mastered the basics.