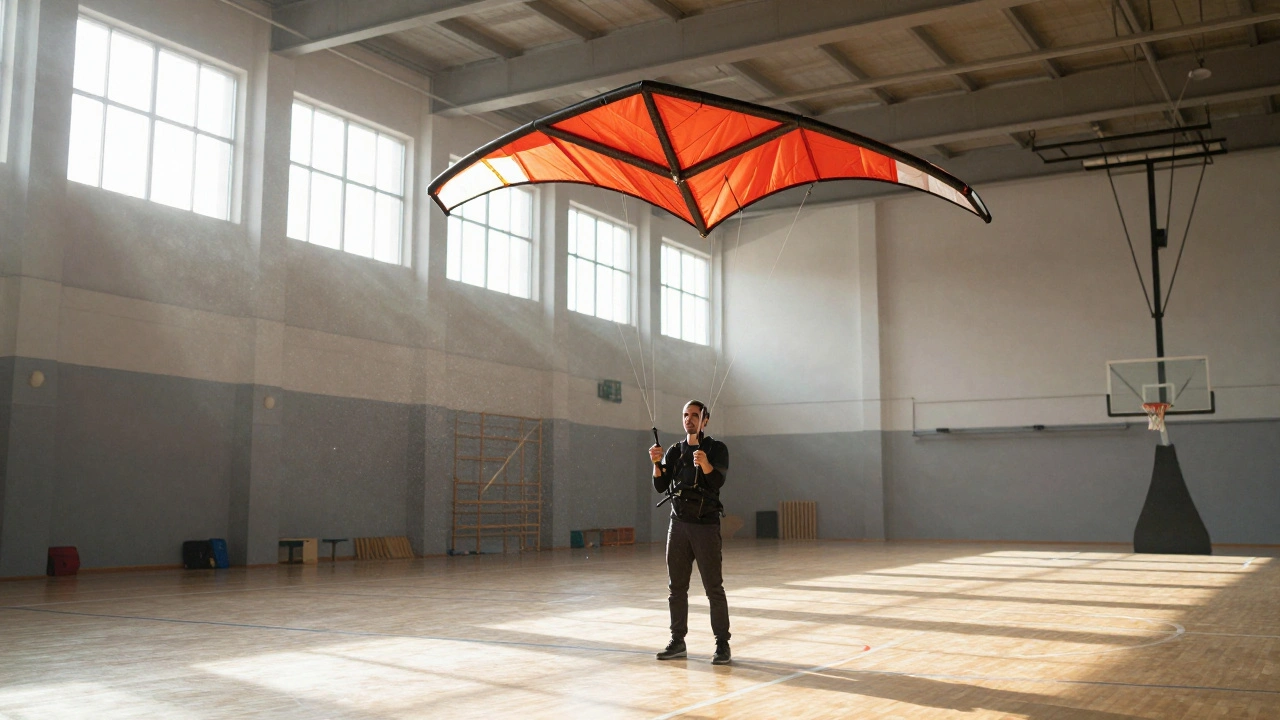
Imagine standing in a gymnasium with absolutely no wind. The air is dead still. Most people would say you can't fly a kite here. They are wrong. With Revolution Indoor Kites, a specific type of quad-line stunt kite designed for controlled indoor environments, you can perform complex aerial maneuvers that look like magic. These aren't the simple diamond shapes you flew at the beach as a kid. This is precision engineering meeting athletic control.
If you have ever watched professional indoor kite competitions, you know the spectacle. The pilot moves their hands slightly, and the kite loops, dives, and spins with impossible speed. It feels like the kite has a mind of its own. But it doesn't. It responds directly to your inputs through four lines connected to two control handles. Understanding how this works changes everything about how you see flight.
How Quad-Line Technology Works Indoors
The secret lies in the geometry. A standard single-line kite relies on wind pressure to stay aloft. An indoor quad-line kite uses four separate tethers attached to two hand-held controls to generate lift through forward motion rather than natural wind. When you pull one handle forward, you change the angle of attack on the leading edge of the wing. This creates immediate lift or drop on that side.
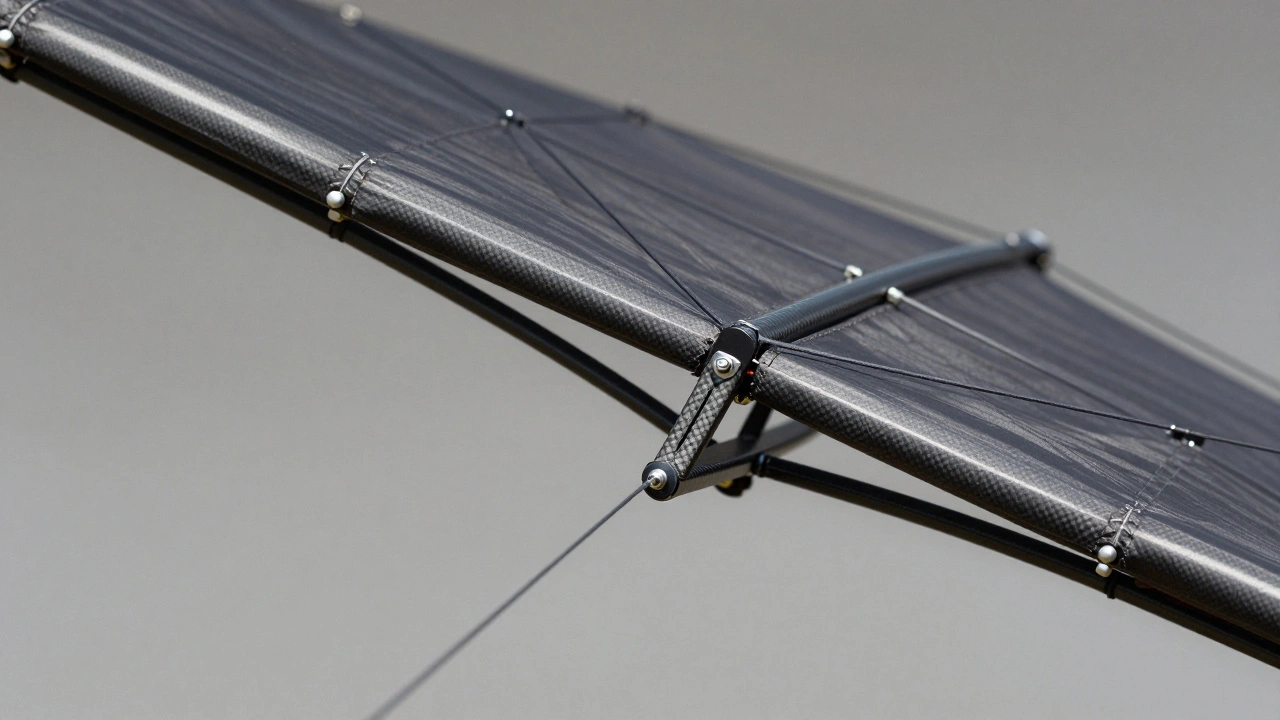
In still air, there is no external force pushing against the fabric. You create the "wind" by moving the kite forward. The faster the kite moves through the air, the more lift it generates. This is why indoor kites are often smaller and lighter than outdoor versions. They need less airspeed to stay up. The frame is usually made from carbon fiber or high-grade fiberglass to keep weight down while maintaining stiffness.
- Lift Generation: Created by forward momentum, not breeze.
- Control Inputs: Four lines allow for independent adjustment of each wingtip.
- Response Time: Near-instantaneous due to short line lengths (usually 15-20 feet).
This setup means you are not just flying; you are piloting. Every micro-movement of your wrists translates directly to the kite's attitude. If you hesitate, the kite stalls. If you are too aggressive, it crashes into the ceiling or walls. The margin for error is small, which is exactly what makes it addictive.
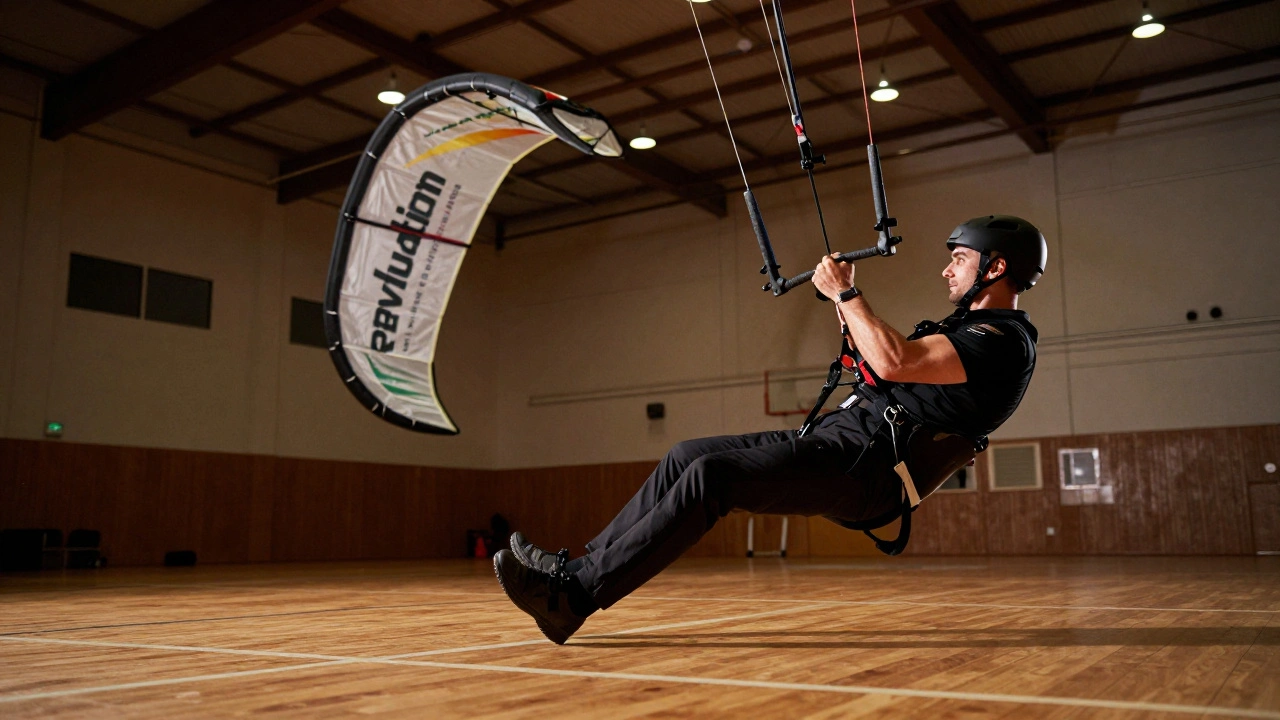
Why Choose Revolution Style Kites?
The term "Revolution" often refers to a specific era or style of indoor kites that emphasized agility and tight turning radii. These kites are built for precision flying, a discipline focused on executing exact geometric patterns and figure-eights with minimal deviation. Unlike freestyle flying, where improvisation is key, precision requires repetition and muscle memory.
These kites typically feature a delta wing shape. This design offers stability during high-speed passes but remains responsive enough for sharp turns. The sail material is usually ripstop nylon, which is durable and resistant to tearing if you accidentally hit a wall. The ribs are thin but strong, allowing the wing to flex slightly under load without breaking.
One major advantage of this style is accessibility. You don't need to wait for perfect weather conditions. You can practice on a rainy Tuesday inside a community center or even a large garage. This consistency helps pilots develop skills much faster than those who only fly outdoors when the wind cooperates.
Setting Up Your Indoor Flying Space
You cannot fly these kites in a living room. You need space. Specifically, you need height and width. A minimum ceiling height of 20 feet is recommended, though many pilots prefer basketball courts or hangars with ceilings over 30 feet. Width matters too. You need at least 40 feet of clear lateral space to execute turns without hitting obstacles.
Air currents indoors can be tricky. HVAC systems create invisible drafts that can throw off your flight path. Before you start, observe dust motes or smoke to identify airflow patterns. Fly perpendicular to these currents initially. As you get better, you will learn to compensate for them automatically.
| Feature | Indoor Quad-Line | Outdoor Single-Line |
|---|---|---|
| Wind Requirement | None (self-generated) | 5-15 mph required |
| Line Length | 15-25 feet | 100-300+ feet |
| Control Handles | Two linked handles | Single bridle point |
| Learning Curve | Steep (high coordination) | Gentle (low coordination) |
Mastering Basic Maneuvers
Start with the hover. Hold both handles steady and move the kite slowly forward until it finds its neutral glide slope. It should hold position relative to you without climbing or dropping. Once you have the hover, try the figure-eight. This is the bread and butter of indoor flying.
- Pull left handle back gently to initiate a turn.
- As the kite completes the arc, push the right handle forward to straighten out.
- Cross your arms smoothly to transition into the next loop.
- Maintain constant tension on all four lines.
Common mistakes include crossing arms too early or losing tension on the trailing lines. If the kite dips suddenly, check your line tension. Slack lines mean lost control. Tight lines mean responsiveness. You want a happy medium where the kite feels alive but not jerky.
Another essential move is the stall turn. Pull both handles back sharply to stop forward momentum. The kite will pivot on its tail. This is useful for changing direction quickly without losing altitude. Practice this near the ground first. It builds confidence in handling sudden changes in aerodynamic forces.
Equipment Essentials for Precision Flying
Your gear matters. Cheap handles slip in sweaty hands, ruining your grip and control. Invest in ergonomic handles with non-slip grips. Look for models with adjustable thumb rests. This allows you to customize the fit to your hand size, reducing fatigue during long sessions.
Lines should be low-stretch dyneema or similar synthetic fibers. Stretchy lines absorb your inputs, making the kite feel sluggish. You want direct connection between your hand and the wing. Check lines regularly for fraying. A broken line mid-flight can cause a crash that damages the delicate wing structure.
Protective gear isn't mandatory, but sensible clothing is. Wear closed-toe shoes. You will be moving around, dodging falling kites. Avoid loose sleeves that could get tangled in the lines. Keep water nearby. Flying indoor kites is surprisingly physical. Your shoulders and core work hard to maintain posture and control.
Troubleshooting Common Issues
If your kite consistently veers left, check for asymmetry in the wing. One rib might be bent, or one side might have tighter stitching. Adjust the bridle points on that side to balance the lift. Small tweaks make big differences.
Stalling frequently? You are likely pulling back too hard on the handles. Remember, forward motion equals lift. Push the handles forward slightly to regain speed. Don't fight the stall; recover from it by accelerating.
Crashing into walls? Your peripheral vision is lagging. Focus on the horizon ahead of you, not just the kite. Use your body rotation to track the kite's path. Anticipate where it will be, not where it is. This predictive movement keeps you centered in the flight zone.
Joining the Community
Indoor kite flying has a dedicated following. Organizations like the International Kiteboarding Association (IKA) host indoor events. Watching others fly helps you spot techniques you haven't tried yet. You might notice how advanced pilots use subtle wrist flicks instead of full arm movements. These nuances save energy and increase precision.
Local clubs often meet in gyms or warehouses. Bring your kite and ask questions. Experienced pilots are usually eager to share tips. They remember being beginners themselves. Learning from others accelerates your progress significantly. You avoid common pitfalls and pick up efficient habits early.
Can I fly an indoor kite in my house?
Not really. Most homes lack the necessary ceiling height and open floor space. You risk damaging furniture and walls. Look for local community centers, schools, or sports halls with high ceilings and smooth floors.
What is the best kite for beginners?
Look for a stable delta-wing model with forgiving flight characteristics. Brands like ParaKite or Skydancer offer entry-level indoor kits. Avoid highly agile competition models until you master basics like hovering and figure-eights.
Do indoor kites require wind?
No. Indoor kites generate their own lift through forward motion created by the pilot's movements. They are specifically designed to fly in zero-wind conditions, relying on aerodynamic principles rather than environmental factors.
How do I fix a bent kite frame?
For minor bends in carbon fiber or fiberglass, gentle heat from a hairdryer can help reshape the material. Support the bend with your fingers while cooling. For severe cracks or breaks, replacement parts are usually available from manufacturers.
Is indoor kite flying expensive?
Initial costs range from $50 to $150 for a decent beginner kit. Maintenance is low if you fly carefully. Joining a club may involve membership fees, but access to venues saves rental costs. It is generally cheaper than many motorized hobbies.