There is nothing worse than watching your favorite kite is a tethered object that flies using wind lift tear in half just as the wind picks up. You are standing on a beach or in a park, adrenaline pumping, ready to launch, and then-snap. The leading edge rips, or the bridle snaps. It happens to everyone, from seasoned flyers to first-timers. But it doesn’t have to end your session. With a proper kite repair kit is a collection of tools and materials designed to fix damaged kites, you can turn a disaster into a five-minute fix and get back in the air before the breeze dies down.
Most people think they need specialized equipment to patch a kite. They don’t. In fact, carrying heavy, complex gear often leads to frustration when things go wrong under pressure. The best approach is simplicity. A well-curated set of lightweight, versatile tools works better than a bulky toolbox. Whether you fly traditional diamond kites, high-performance stunt kites, or large power kites, the core principles of repair remain the same. This guide breaks down exactly what belongs in your bag and how to use it effectively.
The Core Components of a Kite Repair Kit
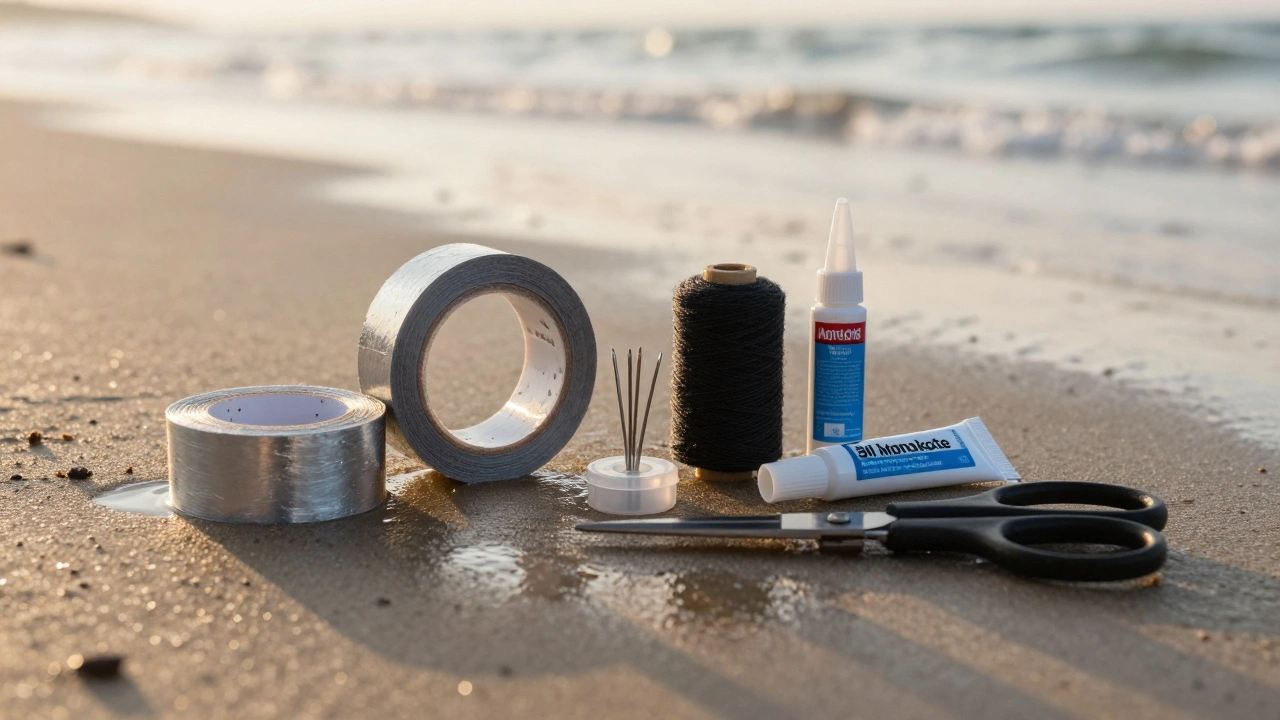
You do not need ten different types of tape or three kinds of glue. You need reliability. When you are holding a fragile sail in one hand and fighting the wind with the other, you want tools that work instantly. Here are the non-negotiable items for any serious flyer’s kit.
- Repair Tape: This is your most critical tool. Standard duct tape is too heavy and leaves residue that damages fabric. Instead, use monokote tape is specialized self-sealing tape used for model aircraft and kites. It is thin, strong, and bonds permanently to ripstop nylon and polyester without adding significant weight. Keep rolls in silver, black, and white to match common kite colors.
- Strong Thread: Carry spools of nylon thread is high-strength synthetic fiber used for sewing and tying. Size 40 to 60 pound test is ideal for general repairs. For lighter kites, size 15 to 20 might suffice, but heavier line handles stress better. Use waxed thread if possible; it resists fraying and knots more securely.
- Needles: You need two types. A standard curved upholstery needle for sewing through thick foam or multiple layers of fabric, and a fine-eyed needle for delicate sail work. Keep them in a small container so they don’t roll away into the sand.
- Super Glue (Cyanoacrylate): Liquid CA glue is essential for bonding plastic parts, such as broken struts or snapped bridles. Gel-based super glue is less messy and stays where you put it, making it safer for outdoor use. Avoid cheap brands; they dry brittle and crack under tension.
- Cutters: Small, sharp scissors or a utility knife blade. Blunt scissors crush thread and fray fabric edges, making repairs weaker. A fresh blade ensures clean cuts every time.
These five items cover 90% of field repairs. Anything else is nice to have, but not strictly necessary. Keep them in a small, waterproof pouch. Sand and saltwater ruin tools quickly, so protection matters.
Fixing Torn Fabric and Sail Damage
Fabric tears are the most common issue. Wind gusts, ground contact, and tangled lines all cause rips. How you fix it depends on the severity and location of the damage.
For small holes or slits along the leading edge, monokote tape is your best friend. Clean the area first. If there is dirt or sand, wipe it off with a damp cloth or even your shirt. Dry the surface completely. Then, apply the tape over the hole, extending at least an inch beyond the tear on all sides. Press firmly. Monokote tape stretches slightly as you smooth it out, which helps it conform to the shape of the kite. Do not stretch it too much, or it will pull tight and distort the sail.
If the tear is larger, say, more than two inches long, taping alone might not hold under high wind loads. In this case, you need to reinforce the patch with stitching. Turn the kite inside out if possible. Align the edges of the tear. Sew a simple running stitch along both sides of the rip, about a quarter-inch away from the edge. Use a double knot at the start and end. Once stitched, apply monokote tape over the seam. The tape seals the stitches, preventing water absorption and further fraying, while the thread provides structural integrity.
Avoid using household duct tape for fabric repairs. It adds unnecessary weight, which changes the flight characteristics of the kite. A heavier leading edge can cause the kite to dive or stall. Monokote tape is nearly weightless and maintains the aerodynamic balance of the design.

Repairing Broken Struts and Frames
Struts break when kites crash hard or get caught in trees. Carbon fiber and fiberglass rods are strong but brittle. When they snap, they rarely reconnect perfectly without reinforcement. Plastic struts, found on cheaper kites, can sometimes be melted back together, but this is rarely reliable.
For carbon or fiberglass struts, super glue is the primary fix. Break the rod cleanly if possible. If it shattered, discard the piece and replace it. If it snapped in two, align the pieces precisely. Apply a small amount of gel super glue to the break point. Hold them together for 30 seconds until the bond sets. To strengthen the joint, wrap a small piece of monokote tape or electrical tape around the glued area. This acts as a splint, distributing stress across a wider area rather than concentrating it at the break point.
If the strut is cracked but not fully broken, you can extend its life by reinforcing it. Wrap the crack tightly with tape immediately. Then, apply super glue over the tape. This creates a rigid shell around the weak spot. It won’t look pretty, but it will hold up for several flights until you can install a permanent replacement rod.
Never ignore a cracked strut. Flying with a compromised frame risks losing the kite entirely. A sudden failure mid-air can send the kite tumbling into traffic or water, making retrieval impossible.
Bridle and Line Connection Repairs
The bridle connects the kite to the flying line. It takes the most direct stress during launches and landings. Frayed threads, loose knots, or broken attachment points are common failure modes.
If a bridle thread frays, cut off the damaged section and re-tie the knot. Use a figure-eight loop is a secure knot structure used to create fixed loops in rope or a double fisherman’s knot is a strong binding knot used to join two ropes. These knots are standard in climbing and sailing because they resist slipping under load. After tying, dip the knot in super glue. This locks the fibers in place and prevents unraveling. Let it dry completely before testing.
If the attachment point on the kite frame tears, reinforce it with a patch of monokote tape underneath the fabric. Then, sew the bridle eyelet or loop onto the reinforced area. Distribute the load across a broader section of the sail to prevent future tearing. Never attach a bridle directly to a single stitch on thin nylon; it will rip through almost instantly under tension.
Check your flying line regularly. Look for nicks, abrasions, or discoloration. A worn line can snap without warning. If you see damage, cut the line back to a fresh section and tie a new loop. Always carry extra line spares in your kit. Losing your main line means losing your kite.
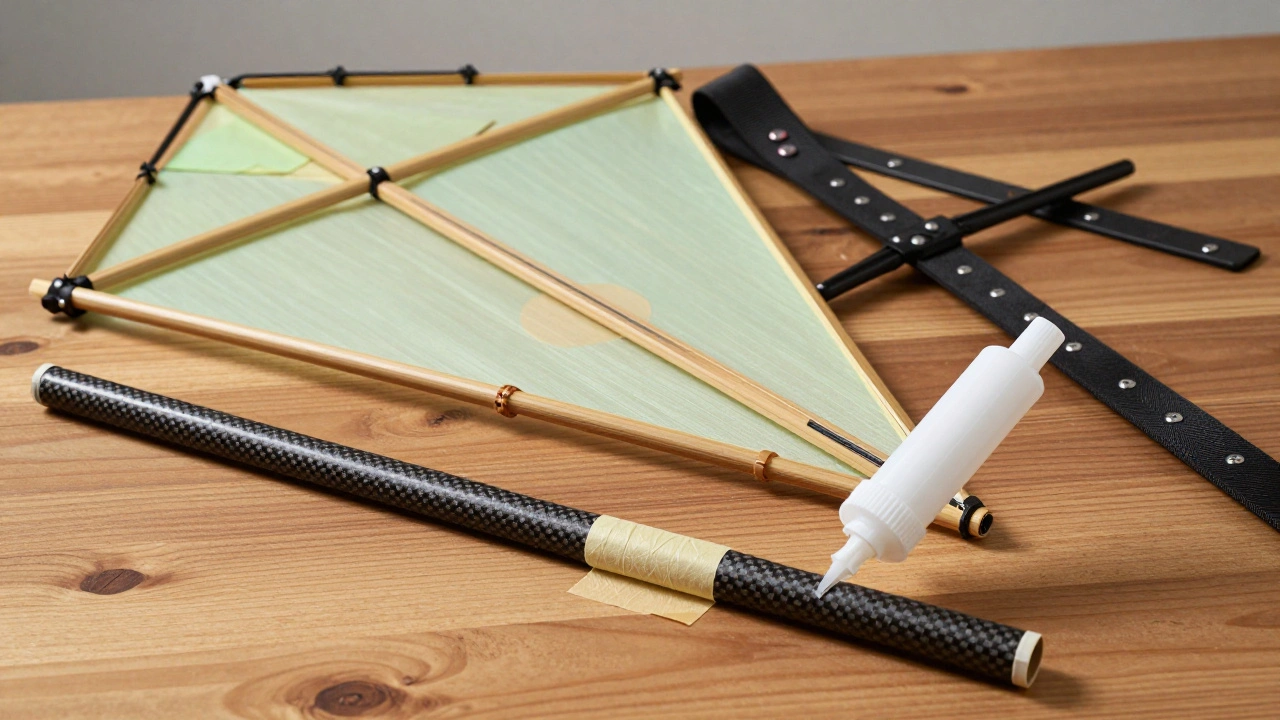
Essential Tools for Specific Kite Types
Different kites require slightly different approaches. Understanding these nuances helps you prioritize your kit contents based on what you fly most often.
| Kite Type | Common Issues | Best Repair Method | Special Tools Needed |
|---|---|---|---|
| Stunt Kites is dual-line kites designed for acrobatic maneuvers | Torn sails, broken control bars | Sewing + Monokote Tape | Curved needles, waxed thread |
| Power Kites is large kites used for traction sports like kitesurfing | Ripped leading edges, strap failures | Heavy-duty patches, rivets | Rivet gun, heavy-duty thread |
| Traditional Kites is single-line kites made of wood and paper/plastic | Broken bamboo sticks, torn paper | Glue, splinting, patching | Wood glue, masking tape |
| Parafoils is soft kites without rigid frames, used for traction | Cell leaks, torn seams | Adhesive patches, sewing | Vinyl cement, large needles |
Stunt kites demand precision. Their tight turns generate high G-forces, so repairs must be balanced. Uneven weight distribution causes drift and poor handling. Power kites, used in kitesurfing and snowkiting, take massive abuse. Rivets and heavy-duty straps are often needed here because tape alone cannot withstand constant pulling forces. Traditional kites rely on wood or bamboo. Wood glue and splints work best for these, as adhesives bond well with porous materials. Parafoils, lacking rigid frames, depend entirely on their cells staying inflated. Leaks in the leading edge cells kill lift. Vinyl cement or specialized adhesive patches seal these leaks effectively.
Maintenance Tips to Prevent Repairs
The best repair is the one you never need. Proper care extends the life of your kite significantly. Before each flight, inspect the bridle, struts, and sail for signs of wear. Look for thinning fabric, loose threads, or cracks in the frame. Catching issues early prevents catastrophic failures mid-flight.
Store your kite properly. Roll it gently instead of folding it sharply. Sharp folds create creases that weaken fabric over time. Keep it in a cool, dry place. Sunlight degrades nylon and polyester, making them brittle and prone to tearing. UV-resistant sprays can help, but storage is the real defense.
Clean your kite after flying in salty or sandy environments. Rinse it with fresh water and let it dry completely before packing. Salt crystals scratch fabric and corrode metal components like grommets and hooks. Sand acts as an abrasive, grinding down threads and seams over repeated uses.
Finally, learn to land safely. Most damage occurs during takeoff and landing. Practice low-wind launches and gentle retrievals. Avoid dragging the kite across rough ground. If you must drag it, pick it up frequently to clear debris and reduce friction.
Can I use duct tape to fix a kite?
You can use duct tape in an emergency, but it is not recommended for long-term repairs. Duct tape is heavy, leaves sticky residue that damages fabric, and lacks the tensile strength needed for high-performance kites. Monokote tape is thinner, stronger, and specifically designed for aerospace and kite applications. It preserves the aerodynamic balance of the kite and does not degrade the material.
How do I fix a hole in my kite sail?
For small holes, clean the area and apply monokote tape over the hole, extending an inch beyond the edges. For larger tears, sew the edges together with strong nylon thread, then cover the seam with monokote tape. This combination provides both structural strength and weatherproofing. Ensure the fabric is dry and clean before applying any adhesive or tape.
What type of glue works best for kite struts?
Gel-based cyanoacrylate (super glue) is the best choice for repairing carbon fiber or fiberglass struts. It sets quickly, bonds strongly to plastics and composites, and remains flexible enough to handle vibration. Liquid super glue can run and make a mess, so gel is preferred for outdoor use. Apply a small amount, hold the pieces together for 30 seconds, and reinforce with tape for added strength.
How should I store my kite to prevent damage?
Roll your kite gently instead of folding it to avoid creating sharp creases that weaken fabric. Store it in a cool, dry place away from direct sunlight, which degrades nylon and polyester over time. After flying in sand or saltwater, rinse the kite with fresh water and let it dry completely before packing to prevent corrosion and abrasion.
Is it safe to fly a kite with a repaired strut?
Yes, if the repair is done correctly. Reinforce glued joints with tape to distribute stress. However, always inspect the repair before each flight. If the strut feels flexible or shows new cracks, replace it immediately. Flying with a compromised frame risks losing the kite and potentially injuring others if it falls unexpectedly.