Pendulum Suspension Systems: Stabilizing Your KAP Camera Rig
Mar, 26 2026
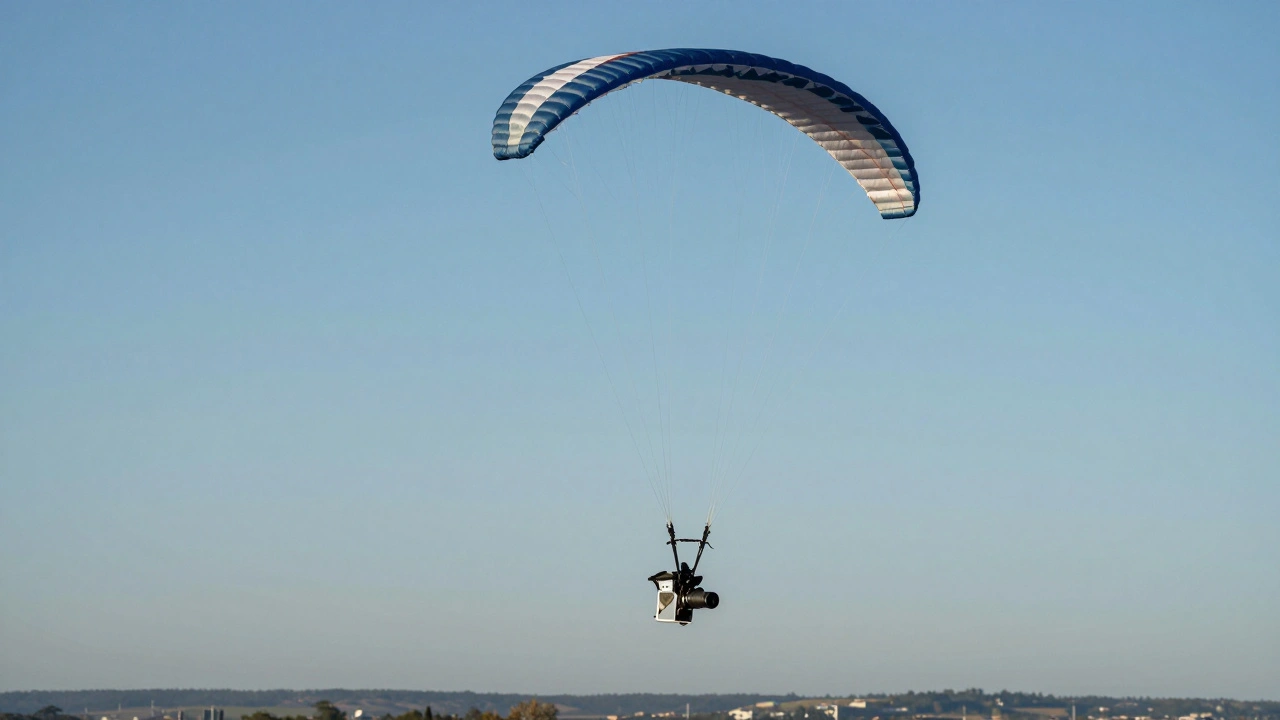
You've spent hours flying your Quadline Parafoil, the sky is clear, and the light is perfect. But when you download the images, the horizon looks like it's tilting on a funhouse mirror ride.
That jittery footage isn't bad luck; it's a physics problem. In Kite Aerial Photography (KAP), wind gusts transmit energy directly through your bridle lines to your camera sensor. To fix this, you need a proper suspension solution.
The Physics Behind the Pendulum Effect
Imagine a grandfather clock. When the weight drops, it swings smoothly back and forth around a fixed point. This is the same principle we apply when stabilizing a KAP Camera Rig. By suspending the camera below the connection point, we create a natural filter for high-frequency vibrations caused by wind turbulence.
A Pendulum Suspension System works by increasing the period of oscillation. When the kite jerks left, the suspended camera wants to stay moving right due to inertia. If the pendulum length is calculated correctly, these movements cancel each other out before the sensor even registers them. Most beginners cut the suspension line too short. For a standard DSLR setup, you typically want a length that keeps the pendulum frequency well below the shutter speed threshold.
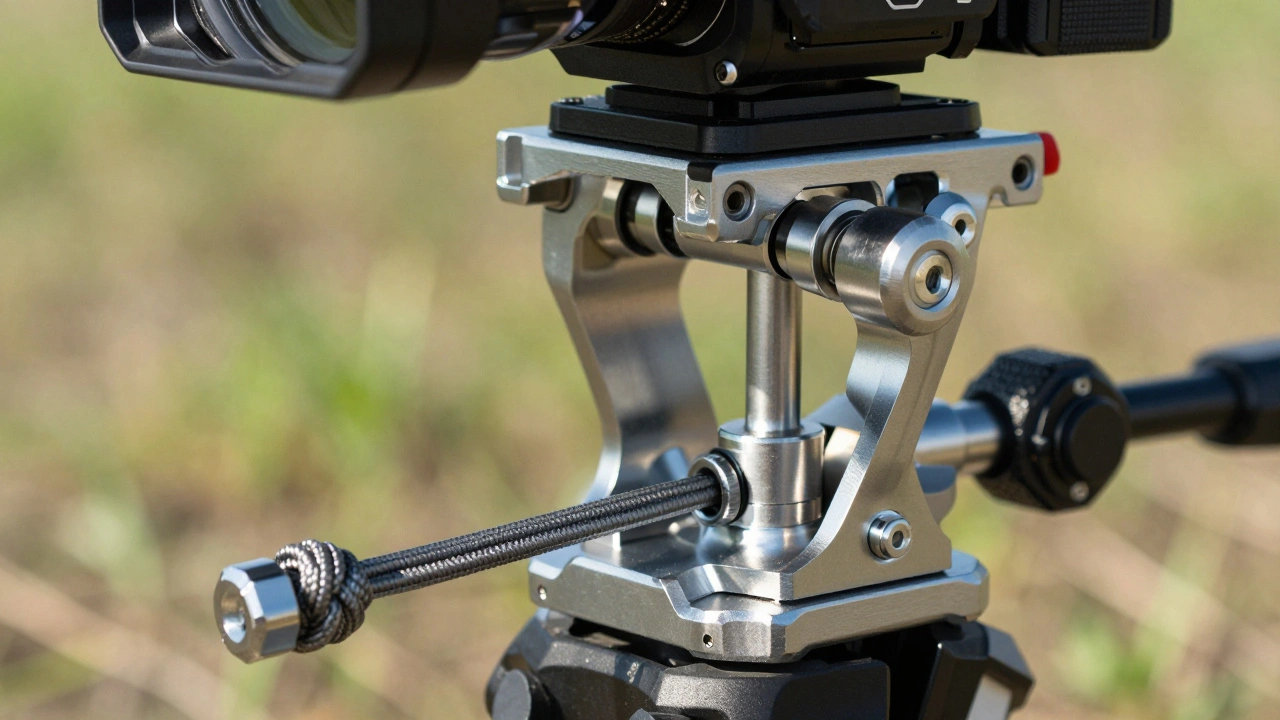
Core Components of a Stable Rig
Building a reliable setup isn't just about tying knots. You need specific hardware to ensure the system absorbs shock rather than amplifying it. Here is what you need in your arsenal:
Suspension Line: This connects your bridle to the camera mount. Dyneema or Spectra lines work best due to low stretch, but add elastic inserts to dampen sudden snaps.
Counterweights: Located above the pivot point. These help balance the load against heavy cameras.
Gimbal Head: While the pendulum handles pitch and roll, a three-axis gimbal prevents yaw rotation.
Drag Devices: Sometimes known as spin arrestors. They prevent the entire payload from spinning wildly in high winds.
In Portland, Oregon, we deal with unique coastal humidity. Standard plastic components often degrade faster near the river valley fog. I recommend switching to stainless steel fittings for your suspension points. This small change saves weeks of rust repair during the rainy spring season.
Finding the Center of Gravity
If your rig wobbles uncontrollably, your weight distribution is likely off. The center of gravity (COG) dictates how the system reacts to movement. Ideally, the COG should sit slightly below your camera lens axis. This lowers the swing radius and creates a tighter stabilizing loop.
To test this, hold the suspension line taut between two fingers. Slide the weight bar up or down until the camera hangs perfectly horizontal without tilting. Mark this spot. If you switch from a lightweight mirrorless body to a full-frame camera, you must recalculate this point every time. A shift of even an inch changes the pendulum period drastically. In 2026 camera markets, newer lenses are often heavier at the front, which shifts the COG forward. Adjust your counterweight accordingly to compensate.
Stabilization Methods Comparison
Method
Cost
Mechanical Complexity
Best Use Case
Pendulum System
Low ($50-$150)
Passive
Moderate Wind Conditions
Active Gimbal
High ($500+)
Electronic
Extreme Turbulence
Rigid Mount
N/A
None
Calm Days Only
Troubleshooting Oscillation Issues
Sometimes you do everything right, and the image still blurs. This usually comes down to resonance. If your kite is vibrating at the same frequency your camera is swinging, you get constructive interference. The jitters amplify instead of canceling.
Try changing the line material. Carbon fiber rods tend to vibrate at different frequencies compared to Kevlar. Adding a rubber damper knot halfway down the suspension line can also absorb these resonant frequencies. Don't forget to check your bridle configuration. A symmetrical parafoil usually induces less vibration than a dual-line sport kite, which naturally has more torque applied during steering inputs.
Another common culprit is camera settings. High ISO introduces noise that mimics blur. Use a fast shutter speed. Since you are flying at altitude, wind shear is stronger. A 1/2000 second shutter ensures that the mechanical stabilization isn't fighting electronic noise. Combine this with a wide-angle lens to reduce the visual impact of any remaining movement.
Safety and Wind Limits
Never ignore the environment. A pendulum system adds weight to your payload. As wind speeds increase, the angle of pull shifts. At certain angles, the pendulum stops acting as a stabilizer and starts acting as a sail. Keep a close eye on line tension gauges.
In our area, gusts can spike unexpectedly from the west over the hills. Set a hard limit on your kite size. If the wind passes 15 knots, consider switching to a smaller wing or landing entirely. Always secure your camera battery doors. A vibrating rig can loosen latches over time. Use zip ties or silicone tape for extra security. The cost of a lost camera is far higher than the time spent securing your gear.
Comparing Passive to Active Solutions
Why not just use a gyro-stabilized gimbal like those found on drones? Electronic gimbals are powerful, but they have failure points. Motors burn out, batteries die, and electronics get wet. A simple pendulum system relies on basic Newtonian physics. It has no chips, no firmware updates, and no Bluetooth connectivity required.
Hybrid setups exist, combining a small passive pendulum arm inside an electric gimbal box. This offers the best of both worlds. However, for most hobbyists, a pure mechanical system is robust enough for 90% of flights. Save the $500 investment for a better camera sensor. Mechanics are cheaper and easier to repair in the field with a pocket knife and zip ties.
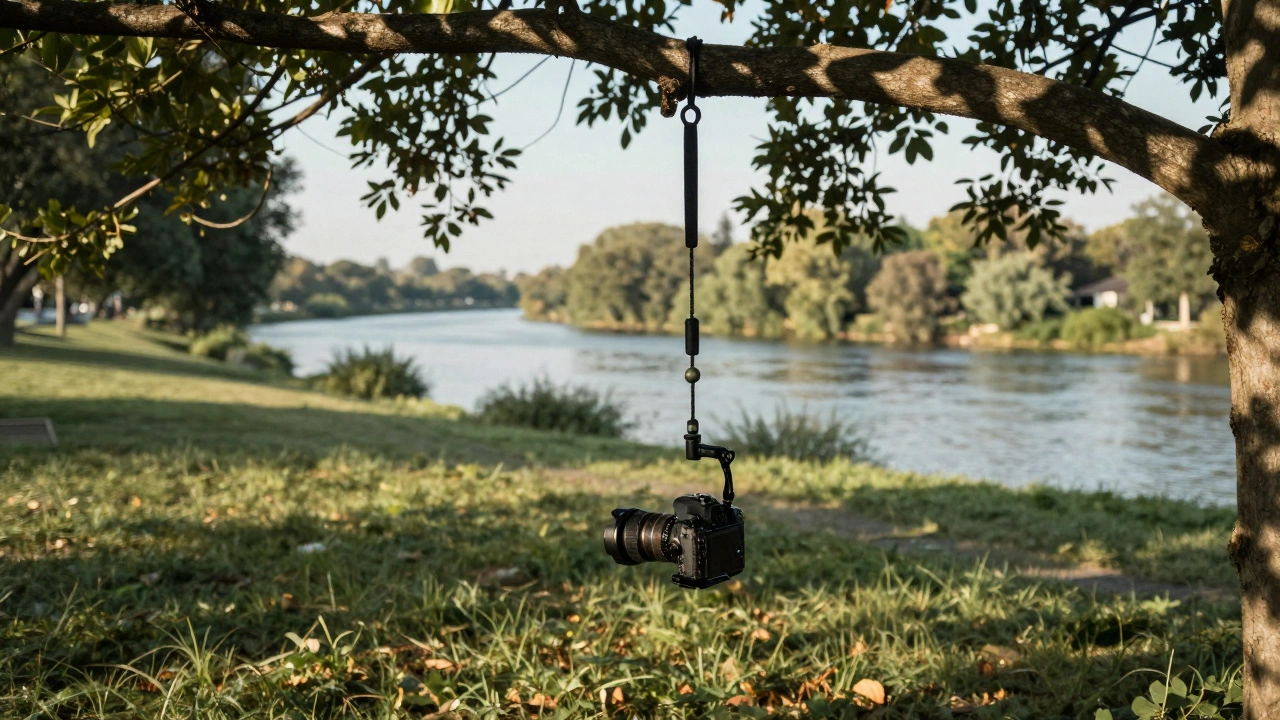
Testing Before You Fly
Before launching your rig at full altitude, conduct ground tests. Suspend the camera from a tree branch at a height of roughly ten feet. Shake the support line vigorously. Watch how the camera settles. Does it oscillate five times before stopping? That's good. Does it spin endlessly? You need more damping material.
Take video recordings of your test shake. Play it back in slow motion. Look specifically at the horizon line. If it dips during the stop phase, adjust your counterweight. This pre-flight ritual takes five minutes but saves hours of editing later. Once you fly successfully, log your settings for next time. Weather conditions vary daily, and your notes become a valuable database for future flights.
What is the ideal length for a pendulum suspension line?
The length depends on your kite type and wind speed. Generally, a length between 3 to 5 feet works best for standard parafoils. Shorter lines react faster but may not dampen low-frequency sways. Longer lines are more stable but increase drag. Test incrementally.
Can I use a smartphone in a KAP rig?
Yes, smartphones are popular payloads. Just remember they are lighter than DSLRs, meaning the pendulum needs a longer line relative to its mass to maintain momentum. Secure the phone firmly to prevent sliding within the cage.
How does humidity affect the suspension system?
Humidity can cause synthetic fibers to stretch slightly or corrode metal connections. Stainless steel is recommended for marine environments like coastal Oregon. Regular inspection of braided lines for fraying is essential in humid climates.
Do I need a controller for this system?
No. A mechanical pendulum system is passive. It relies on gravity and mass, not remote control. However, a camera trigger button is helpful for capturing bursts once stabilized.
Is it safe to fly these in rain?
Not recommended. Water adds unpredictable weight and reduces visibility. Waterproof your camera housing if you must fly in mist, but generally wait for dry days to protect your expensive gear.