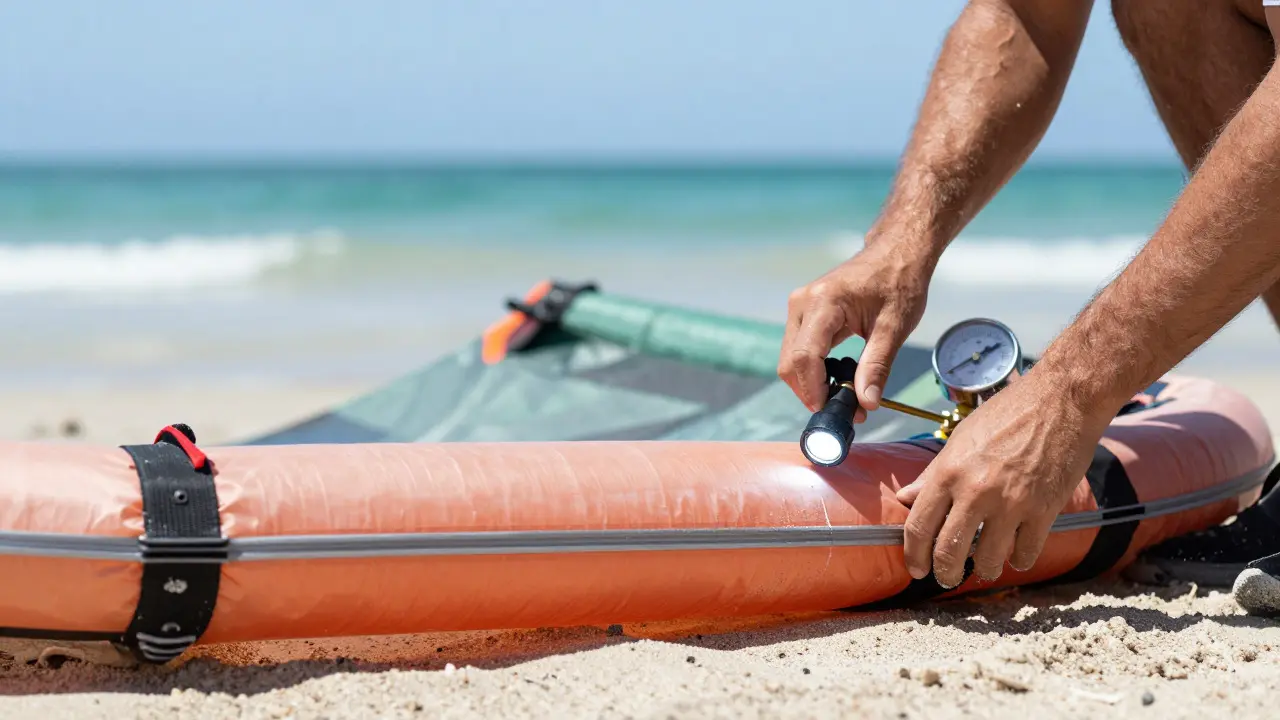
There is nothing worse than feeling that sudden loss of power mid-ride. One moment you are carving hard across the water, and the next, your kite feels like a deflated balloon. If you ride a leading edge inflatable (LEI) kite, this usually means a leak in one of the bladders or a tear in the canopy. The good news? Most of these issues can be fixed on the beach with basic tools, saving you from a costly shop visit or a ruined day.
Understanding how to diagnose and repair your gear is a core skill for any serious kiter. Whether you are dealing with a slow seep in the leading edge or a nasty rip in the fabric, having a clear plan keeps you in control. This guide breaks down exactly how to handle these common failures using methods trusted by riders worldwide.
Quick Summary / Key Takeaways
- LEI bladders are the inflatable tubes at the front of the kite; leaks here cause power loss but rarely require full replacement if caught early.
- Canopy patches use heat-activated adhesive tape to seal tears in the sail fabric, restoring aerodynamic shape.
- Always clean the area before applying repairs to ensure maximum adhesion.
- Use a pump with a pressure gauge to verify repairs hold up to 10-12 PSI.
- Keep a small repair kit in your bag: patches, sandpaper, alcohol wipes, and a marker.
Diagnosing the Problem: Is It the Bladder or the Sail?
Before grabbing your tools, you need to know what is actually broken. A Leading Edge Inflatable (LEI) kite consists of two main structural parts: the inflatable leading edge (the bladders) and the canopy (the fabric wing). Each fails differently.
If your kite loses lift gradually while flying, it is likely an air leak in the bladder. You might hear a hissing sound near the valve or see bubbles in the water when the kite dips. If the kite flies erratically, drags heavily, or has visible holes in the colored fabric, you are looking at a canopy issue. Distinguishing between these two saves time because the repair materials are different.
Start by inflating the kite partially. Walk around it slowly. Listen for hisses. Look for wet spots on the foam or fabric. For canopy tears, shine a light through the fabric in a dark room or against the sun to spot pinholes that aren't visible to the naked eye.
Fixing LEI Bladder Leaks
The leading edge is made of durable PVC or TPU material, but it takes abuse from sand, rocks, and UV exposure. Small punctures from debris are the most common cause of failure. Here is how to fix them properly.
- Clean the Area: Use rubbing alcohol or soapy water to clean the spot around the leak. Remove all dirt and salt residue. Let it dry completely.
- Prepare the Surface: Lightly scuff the area with fine-grit sandpaper (around 220 grit). This creates a rough surface for the adhesive to grip.
- Apply the Patch: Cut a circular patch slightly larger than the hole. Peel off the backing. Press firmly onto the center of the leak. Rub from the center outwards to remove air bubbles.
- Test Pressure: Inflate the bladder to its recommended pressure (usually 9-11 PSI). Check for leaks again. If it holds for 15 minutes, you are good to go.
Pro tip: If the leak is near the valve, check the valve itself first. Sometimes the rubber O-ring inside the valve gets dirty or torn. Replacing a $2 valve insert is cheaper and faster than patching the bladder every time.
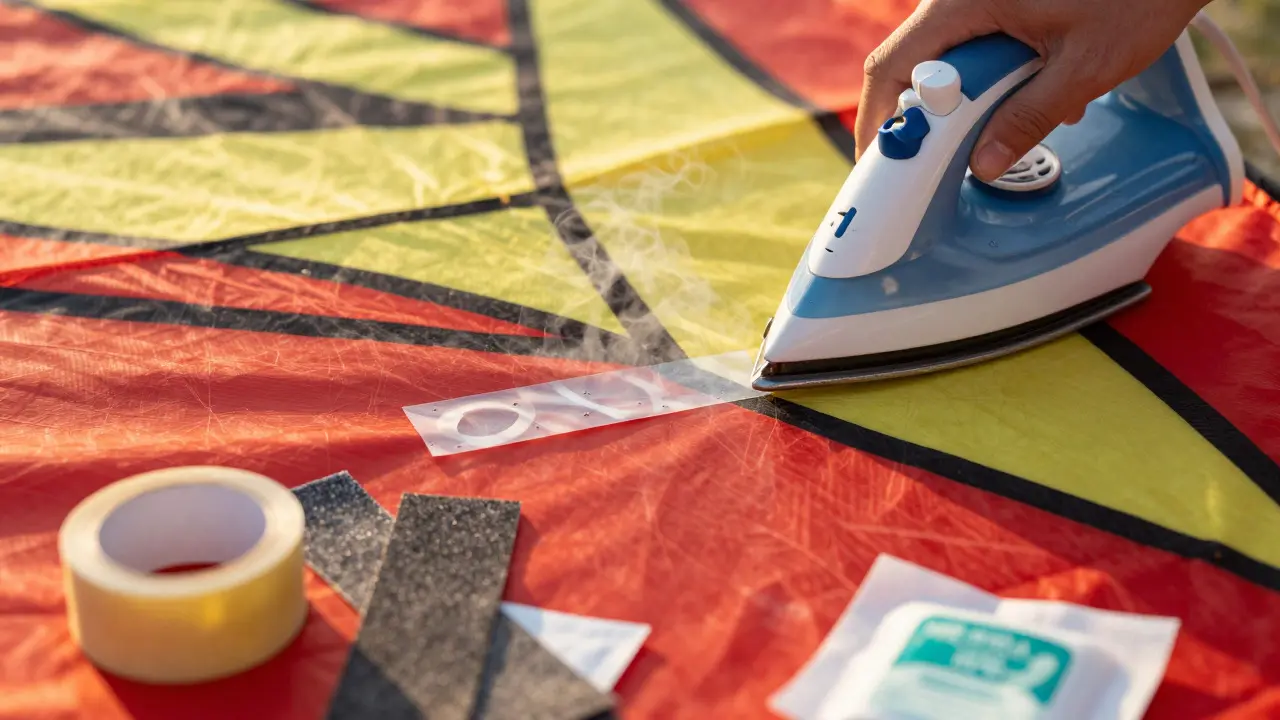
Patching the Canopy Fabric
The canopy is where the magic happens aerodynamically. Tears here affect how the kite turns and holds power. Unlike the thick plastic of the bladder, the canopy is thin polyester or nylon. You cannot use standard duct tape or vinyl patches; they will peel off within a week.
You need specific heat-activated kite tape or iron-on patches. These adhesives bond chemically with the fabric fibers rather than just sticking to the surface.
When patching a tear, do not just cover the hole. Extend the patch at least one inch beyond the damaged area on all sides. If the tear is jagged, trim the loose threads neatly so the fabric lies flat. Apply the patch using a household iron set to low heat (no steam) or a hairdryer on high heat. Move the heat source constantly to avoid melting the fabric underneath.
| Component | Material Type | Recommended Repair Tool | Average Durability |
|---|---|---|---|
| Leading Edge (Bladder) | PVC / TPU Plastic | Vinyl Self-Adhesive Patch | 6-12 Months |
| Canopy Fabric | Polyester / Nylon | Heat-Activated Iron-On Tape | 1+ Season |
| Struts (Foil Kites) | EVA Foam / Carbon | Foam Glue / Epoxy | Varies by Damage |
Essential Tools for Your Beach Bag
You don't need a workshop to keep your gear in top shape. A compact repair kit fits in a standard backpack pocket. Here is what belongs in it:
- Sandpaper (220 grit): Small sheet for prepping surfaces.
- Rubbing Alcohol Wipes: For cleaning without leaving residue.
- Vinyl Patches: Assorted sizes for bladder leaks.
- Iron-On Tape: Roll for canopy repairs.
- Hairdryer or Travel Iron: To activate heat-sensitive adhesives.
- Sharp Scissors: For cutting patches precisely.
- Permanent Marker: To mark the center of the patch.
Investing in quality materials pays off. Cheap generic patches often fail after one session, forcing you to repeat the process. Brands specialized in kite repair offer adhesives tested for marine environments, ensuring they withstand saltwater and UV rays.

Preventing Future Damage
Repair is reactive; prevention is proactive. Most kite damage happens during launch and landing, not while riding. Be extra careful when dragging the kite over sand or rocks. Use a soft landing mat if possible, or choose a grassy spot for takeoff and touchdown.
After each session, rinse your kite with fresh water. Salt crystals are abrasive and can weaken the fabric and PVC over time. Store your kite in a cool, dry place away from direct sunlight. UV degradation makes materials brittle, leading to spontaneous cracks even without impact.
Check your inflation pressure regularly. Under-inflated kites flap more violently, stressing the seams. Over-inflated kites are prone to bursting. Stick to the manufacturer's recommended PSI, usually printed on the kite's label.
When to Call a Professional
While DIY repairs work for 90% of issues, some damage requires expert hands. If the leading edge has a large tear longer than six inches, the internal structure may be compromised. Similarly, if the canopy has multiple complex tears intersecting the struts, a professional shop can reinforce the seam strength better than a home patch.
Professional shops have industrial presses and specialized adhesives that create stronger bonds. They also offer warranty coverage on their work. If your kite is still under warranty, check the terms first-some manufacturers void warranties if non-approved repairs are done.
Can I use regular duct tape to fix my kite?
No. Regular duct tape does not bond well with kite fabrics or PVC in wet conditions. It peels off quickly and leaves sticky residue that attracts dirt. Always use marine-grade vinyl patches or heat-activated kite tape designed for wind sports equipment.
How much pressure should I put in my LEI kite?
Most modern LEI kites require between 9 and 11 PSI. Check the label on your specific model. Using a digital pressure gauge is highly recommended to ensure accuracy, as manual pumps can easily over-inflate if you lose count of strokes.
Does salt water ruin kite patches?
Salt water itself does not immediately ruin patches, but salt crystals left on the surface can degrade the adhesive over time. Rinsing your kite with fresh water after every session significantly extends the life of both the original fabric and any applied repairs.
What is the difference between foil kite and LEI kite repairs?
Foil kites rely on struts filled with air or foam, which are harder to patch than LEI bladders. Foil strut leaks often require replacing the entire strut tube. LEI kites have robust inflatable edges that are easier to patch with standard vinyl kits. Canopy repairs are similar for both types, using heat-activated tape.
How long does a kite patch last?
A properly applied patch using quality materials typically lasts one full season or more. Factors affecting longevity include UV exposure, frequency of use, and whether the kite is rinsed after sessions. Regular inspection ensures small failures are caught before they become major tears.