Quick Takeaways
- Kite art combines aesthetic design with the physics of lift and drag.
- Materials have evolved from simple bamboo to carbon fiber and ripstop nylon.
- Workshops focus on the 'Trinity of Flight': Stability, Weight, and Balance.
- Artistic expression is limited by the wind's impact on the kite's center of gravity.
The Intersection of Art and Aerodynamics
Most people think of kites as toys, but in a dedicated workshop, they are treated as kite art workshops educational sessions where artists learn to combine visual design with the mechanical requirements of flight. The first thing you learn is that beauty cannot come at the expense of physics. If you add a heavy 3D element to the nose of a kite, the whole thing will dive-bomb into the sand. This is where the concept of Aerodynamicsthe study of how gases interact with moving objects comes in.
In these workshops, you don't just draw a picture; you map out the airflow. You learn how the Angle of Attackthe angle between the chord line of an airfoil and the oncoming wind determines whether your art stays aloft or spirals. For instance, a flat-surface kite (like a traditional diamond) creates a massive amount of drag, which is great for stability but makes it harder to steer. By adjusting the curve of the sail, you can transform a static piece of fabric into a dynamic wing.
Choosing the Right Materials for Stability
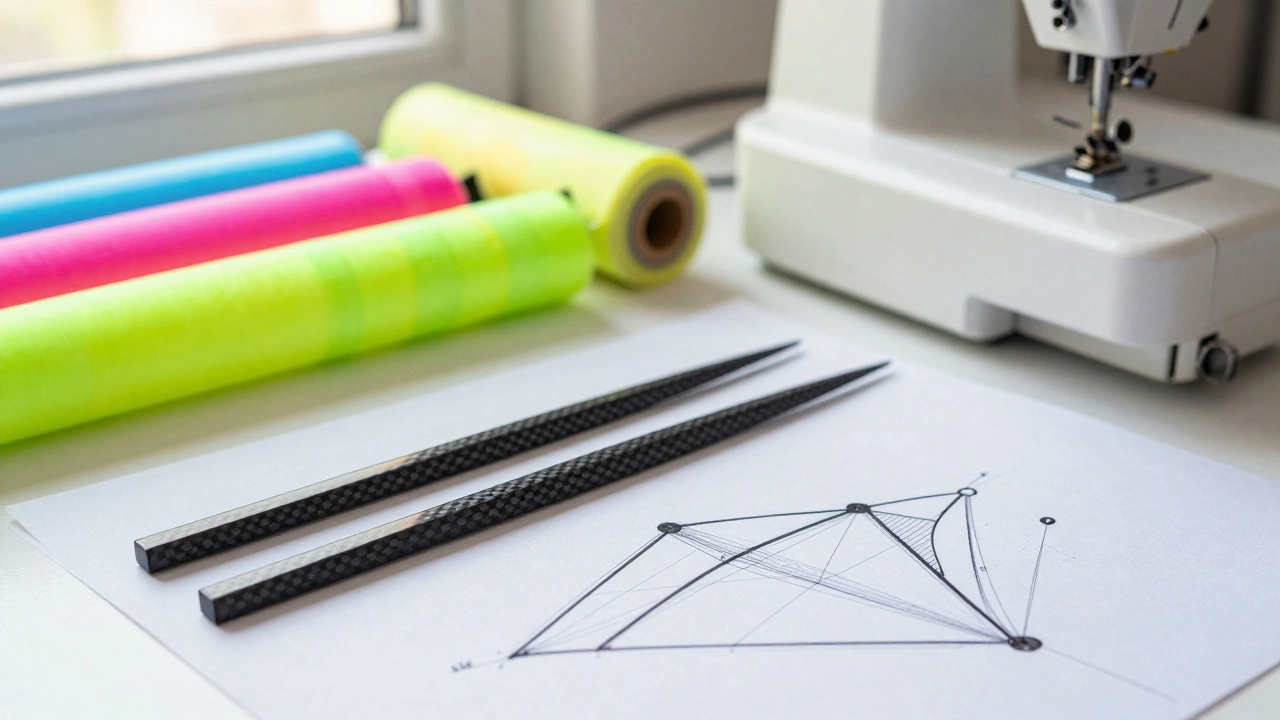
You can't build a professional-grade kite with a plastic trash bag and some scotch tape. Modern workshops introduce you to materials that can withstand the sheer force of a gusty wind without snapping. The backbone of any great kite is the Carbon Fibera high-strength, lightweight composite material made of carbon atoms spar. It is incredibly stiff and lightweight, ensuring the kite maintains its shape even when the wind pushes hard against the fabric.
Then there is the skin. Most artists use Ripstop Nylona reinforced fabric woven with a special strengthening technique that makes it resistant to tearing. This material is essential because it prevents a small puncture from turning into a catastrophic rip mid-flight. If you are creating a piece of art, you have to decide between printed fabrics or hand-painted designs. Using acrylics on nylon often makes the fabric too stiff, which can kill the lift. Instead, pros use specialized fabric dyes that soak into the fibers, keeping the material flexible.
| Material | Strength | Weight | Best Use Case |
|---|---|---|---|
| Bamboo | Medium | Medium | Traditional/Organic designs |
| Carbon Fiber | High | Low | Large-scale art installations |
| Fiberglass | Medium-High | Medium | Bows and cross-spars |
| Ripstop Nylon | High | Low | Sails and canopies |
The Design Process: From Sketch to Sky
Designing a flying artwork happens in three distinct phases. First, you have the conceptual sketch. This is where you decide if you are building a Parafoila foil kite that uses cells to create a wing shape without the need for a rigid frame or a framed kite. A parafoil is basically a floating tube of air, which allows for massive, sweeping shapes that can be seen from miles away. Framed kites, on the other hand, allow for more intricate, rigid shapes like animals or geometric patterns.
The second phase is the structural mapping. This is where you determine the bridle placement. The bridle is the set of strings that connect the kite's frame to the flying line. If the bridle is off by even half an inch, the kite will pull too hard to the left or right. Workshops teach you how to find the exact center of gravity. You'll likely spend an hour just adjusting the knot on your bridle, testing it in a light breeze, and tweaking it until the kite hovers perfectly steady.
The final phase is the aesthetic application. This is where the 'art' part of kite art happens. You might use a technique called reverse-applique, where you cut shapes out of the top layer of fabric and sew a different colored fabric underneath. This creates a bold, clean look that doesn't add extra weight to the kite, which is crucial for flight in light winds.
Mastering the Flight: The Final Exam
Launching a kite you spent twenty hours building is a nerve-wracking experience. In a workshop, this is the 'moment of truth.' You don't just let it go; you use a specific launching sequence. First, you check the wind direction using a simple piece of ribbon. Then, you have a helper hold the kite upwind while you stand 50 feet back.
As the kite catches the wind, you feel the tension in the line. This is called the 'lift.' If the kite starts to oscillate-meaning it rocks back and forth-it's usually a sign that the bridle is too loose or the kite is too heavy for the current wind speed. You'll learn to 'pump' the line, pulling in and letting out a bit of string to create artificial lift, helping the kite climb into the steady currents higher up.
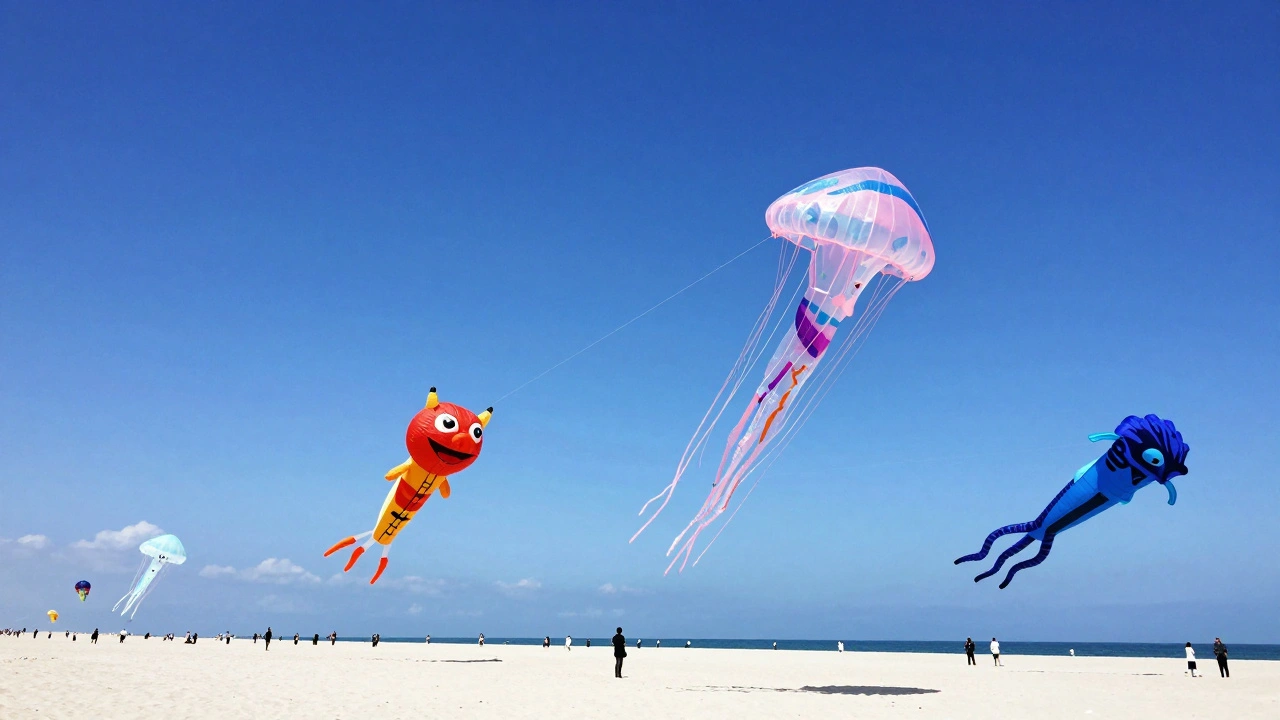
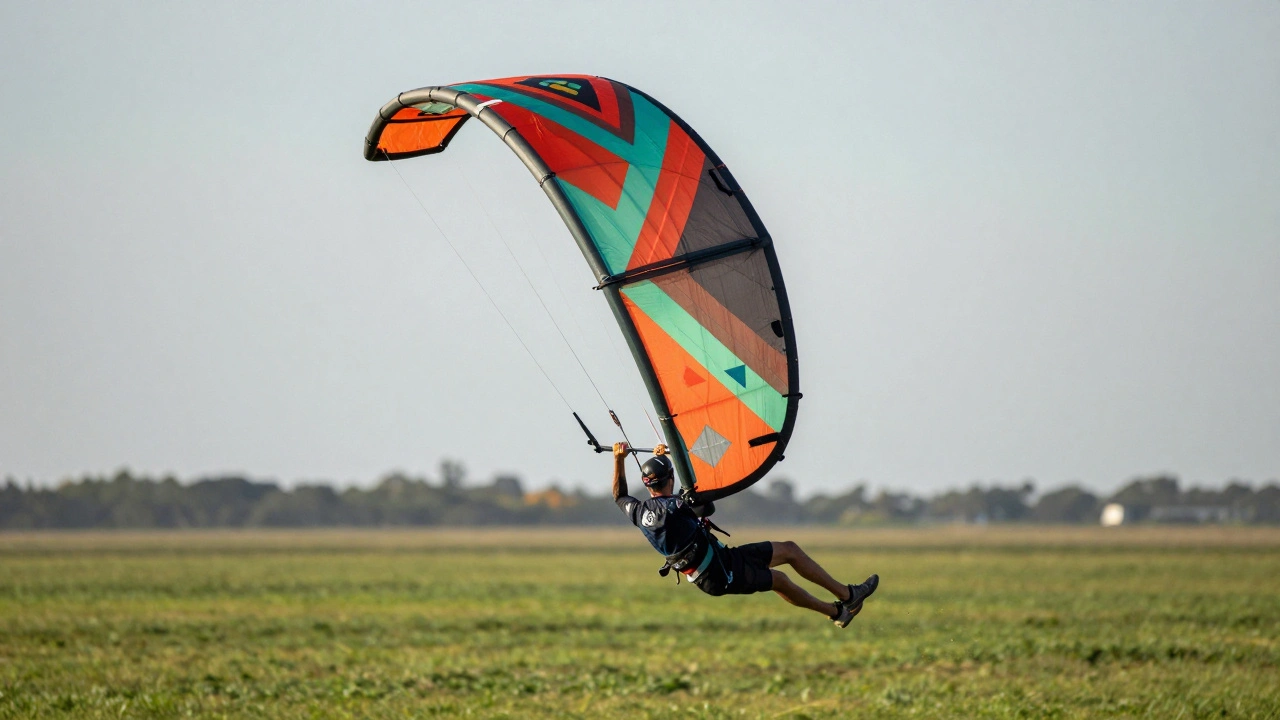
The most advanced part of these workshops is learning to fly Stunt Kitestwo-line kites that allow the flyer to steer the kite with precision. Unlike a single-line kite that just floats, a stunt kite lets you draw shapes in the air. When you combine a beautiful art piece with stunt-kite control, you are essentially performing a dance with the wind. You can make a giant octopus 'swim' through the air or make a dragon 'dive' toward the spectators.
Common Pitfalls and How to Fix Them
Even the most experienced artists run into trouble. One of the most common issues is 'over-building.' It's tempting to add glitter, sequins, or heavy paint to make the kite pop, but every gram counts. If your kite won't launch, try stripping away unnecessary decorations. The wind doesn't care how pretty your kite is if it's too heavy to create lift.
Another common problem is the 'death spiral.' This happens when the kite loses stability and spins rapidly toward the ground. This is almost always a balance issue. Check your cross-spars; if one side is slightly longer than the other, the kite will be asymmetrical and tilt. A quick fix is adding a small piece of tape or a light washer to the shorter side to balance the weight.
Finally, beware of the 'wind window.' New flyers often try to launch their kites directly into a strong headwind, which can snap the frame. You want to launch at the edge of the wind window, allowing the kite to arc upward rather than being slammed backward. Learning to read the wind-noticing how the grass moves or how the waves break-is a skill that takes as much practice as the actual building process.
Do I need prior art experience to join a kite workshop?
Not at all. Most workshops start with the basics of geometry and physics. While a background in sketching or sewing helps, the instructors teach you the specific techniques needed for kite fabrics and framing. The focus is more on the marriage of design and function than on traditional fine art skills.
How long does it typically take to build a professional art kite?
For a beginner in a workshop, a simple framed art kite can be completed in a weekend. However, large-scale projects, like 20-foot octopus kites or complex parafoils, can take several weeks of design, sewing, and testing. The refining process-adjusting the bridle for perfect flight-is where most of the time is spent.
What is the best wind speed for flying art kites?
Most art kites are designed for light to moderate breezes, typically between 5 and 15 miles per hour. Very light winds require extremely lightweight materials like carbon fiber and thin nylon. Conversely, winds over 20 mph can put too much stress on the frame of a large art kite, risking a structural collapse.
Can I use a sewing machine for kite making?
Yes, a sewing machine is highly recommended for the 'skin' of the kite. You'll want to use a straight stitch with a heavy-duty needle that can pierce ripstop nylon without pulling the fabric. Many artists use a walking foot attachment to ensure the nylon doesn't slide during the sewing process.
Where can I find the best locations for a kite workshop?
The best locations are open areas with consistent, non-turbulent wind. Large beaches are ideal because they provide a flat surface for launching and no obstacles like buildings or trees that create 'wind shadows' or unpredictable gusts. Public parks with wide-open fields are also great, provided there are no overhead power lines.
Next Steps for Aspiring Kite Artists
If you are ready to start, don't jump straight into a 30-foot dragon. Start with a small delta kite. It's a forgiving shape that lets you experiment with color and pattern without worrying too much about complex balance. Once you get a delta to fly steadily, try adding a 'tail'-not just for looks, but to see how adding weight to the bottom of the kite increases stability.
Next, look for local kite festivals. Watching a professional fly a massive show-kite will give you ideas about scale and movement that you can't get from a book. Try to talk to the flyers about their bridle setups; most are happy to share their secrets if you ask about the specific wind conditions of the day. Finally, keep a flight log. Note the wind speed, the material you used, and how the kite behaved. This is the only way to truly master the science of flight.