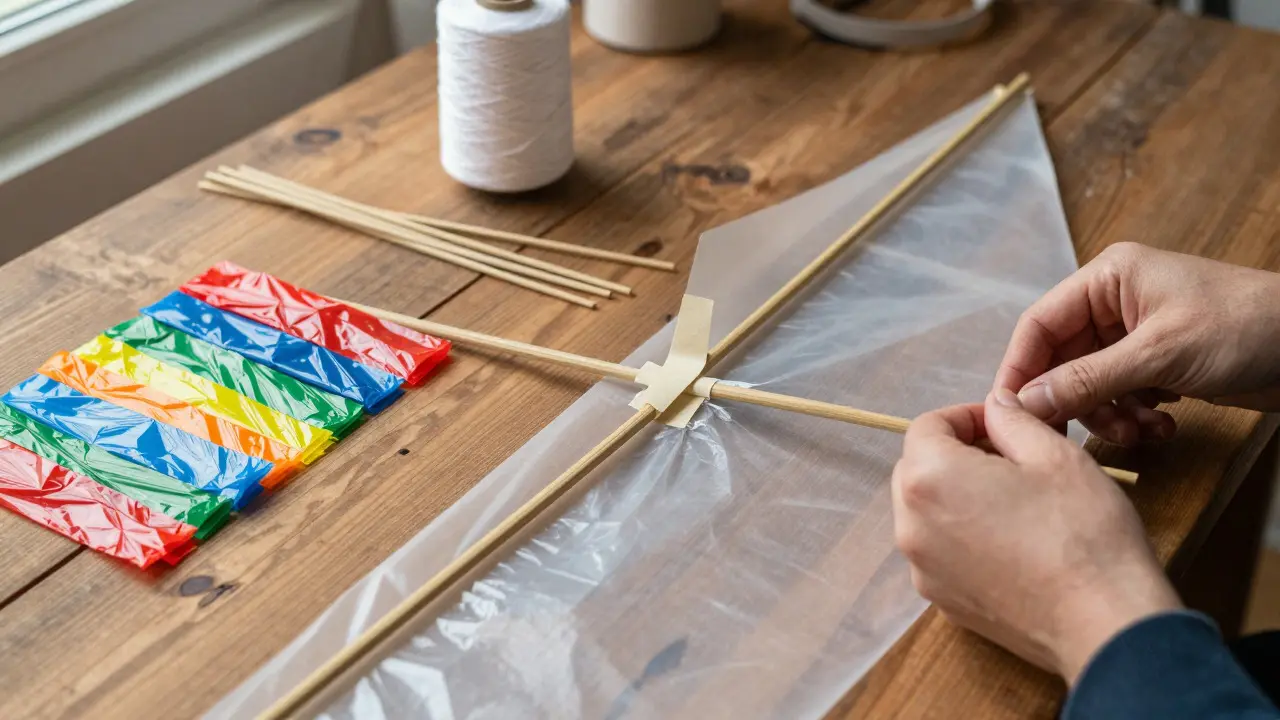
Ever watched a kite stall in the air because the frame was too heavy? It’s frustrating. The good news is that you don’t need expensive carbon fiber or industrial-grade plastics to build a flyer that actually flies. You just need the right balance of weight and strength. This guide breaks down exactly what you need to make a durable, affordable kite from scratch, using materials you can likely find in your garage or a local hardware store for under $10.
The Core Structure: Spars and Frame
The skeleton of any DIY kite is the structural framework that determines its shape and stability. For a beginner, a diamond or delta shape works best. You have three main options for spars (the sticks that hold the shape):
- Bamboo: The classic choice. It’s light, flexible, and cheap. Look for thin dowels or even leftover curtain rods. If they are too thick, split them with a knife to get lighter strips.
- Drinking Straws: Surprisingly effective for small kites. Plastic straws weigh almost nothing. Use two or three taped together for the main spine if you want extra rigidity.
- Lightweight Wood Dowels: Available at any craft store. Pine dowels are soft enough to cut easily but strong enough to handle wind stress.
Avoid metal wires unless you know how to bend them perfectly straight. They add unnecessary weight and can break the sail material if they snap back.
Sail Material: Paper vs. Fabric
The sail is the part that catches the wind. You might think you need special ripstop nylon, but for a budget-friendly project, everyday items work surprisingly well.
| Material | Weight | Durability | Cost | Best For |
|---|---|---|---|---|
| Printer Paper | Very Light | Low (Tears easily) | $0 | Calm days, indoor flying |
| Plastic Bags | Light | Medium (Waterproof) | $0 | Windy days, outdoor use |
| Old T-Shirts | Medium | High | $0 | Larger kites, durability |
| Tissue Paper | Ultra-Light | Very Low | $0 | Indoor only, decorative |
If you live in a place like Portland where it rains often, plastic bags are your best friend. They are waterproof and tear-resistant compared to paper. Just make sure to cut them into large, single pieces rather than taping many small scraps together, as tape adds weight and creates weak points.
Connecting the Parts: Adhesives and Joints
How you connect the spars to the sail matters more than the materials themselves. A weak joint will cause your kite to collapse mid-flight. Here is what works best without buying specialty glues:
- Paper Tape: Ideal for paper sails. It’s thin, drys quickly, and doesn’t warp the paper like liquid glue does.
- Hot Glue: Great for attaching spars to fabric or plastic. Use small dots, not long lines. Too much glue adds significant weight.
- Twine or String: For tying spars together at the corners. Lashing joints with string allows for slight flexibility, which helps the kite absorb gusts without breaking.
A pro tip: Always reinforce the center point where the spars cross. This is the highest stress point on the kite. Add a small square of cardboard or an extra layer of plastic here before attaching the spars.
The Tail: Stability Control
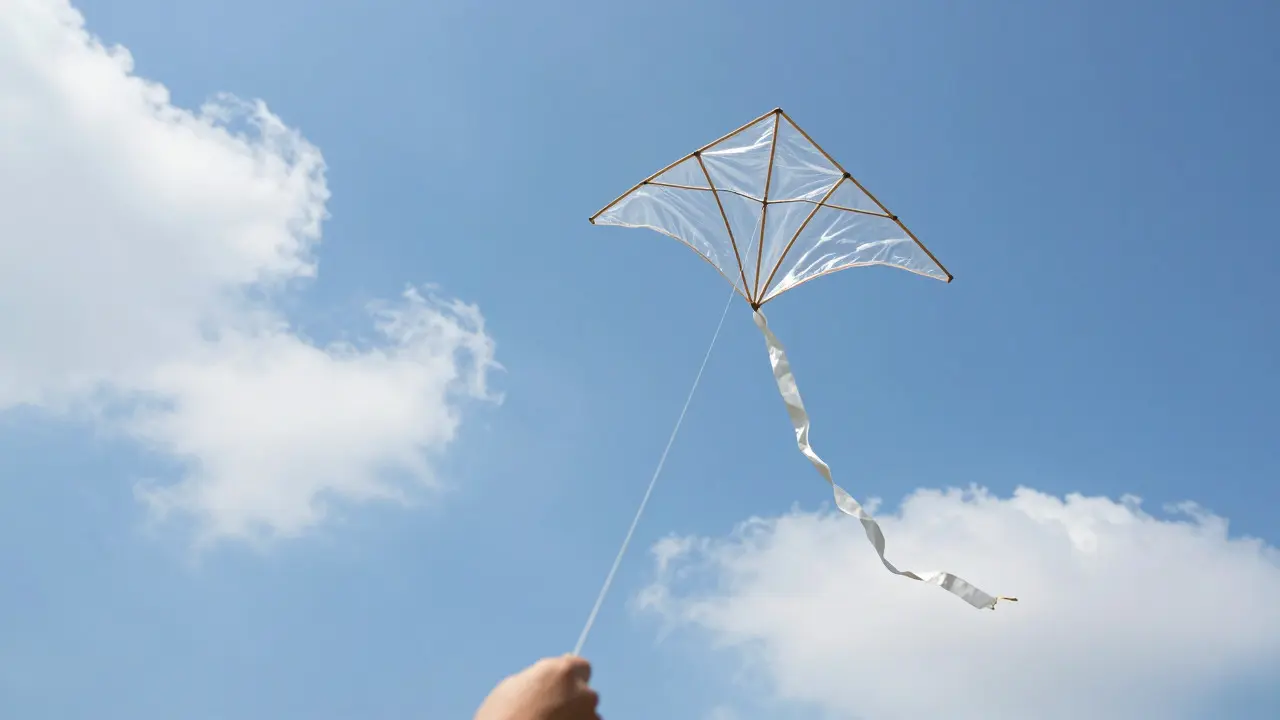
Many beginners skip the tail, thinking it’s just decoration. It isn’t. The tail provides drag that keeps the nose of the kite pointed into the wind. Without it, your kite will spin out of control when the wind picks up.
You can make a tail from:
- Long strips of the same material as your sail.
- Ribbon from clothing.
- Even old phone cables (if you’re feeling creative and bold).
Attach the tail to the bottom tip of the kite. Start with a tail that is about twice the length of the kite itself. If the kite spins too fast, make the tail longer. If it feels sluggish and won’t climb, make the tail shorter.
Line and Bridle System
The line connects you to the kite. Most people reach for fishing line, but that can be dangerous if it snaps and cuts you. For DIY kites, use standard cotton thread or thin nylon cord. It’s cheaper, easier to tie knots with, and safer.
You also need a bridle. This is a Y-shaped string attached to the top and sides of the kite, connecting to the main line. The bridle angle determines how high the kite flies. A steeper angle makes the kite fly higher but requires stronger wind. A flatter angle makes it easier to launch in light winds but limits altitude. Start with a 45-degree angle and adjust as needed.

Step-by-Step Assembly Process
Once you have your materials, follow this sequence to avoid mistakes:
- Cut the Sail: Lay out your plastic bag or paper. Cut a simple diamond shape. Don’t worry about perfect edges; rough edges are fine for a first attempt.
- Prepare Spars: Cut your bamboo or wood dowels to size. One should be slightly longer than the vertical axis of the diamond, and the other should match the horizontal width.
- Attach Spars: Place the spars on the back of the sail. Secure them with paper tape or hot glue. Ensure the crossing point is reinforced.
- Add Bridle: Tie strings to the top corner and the side corners. Bring these strings together at a single point above the kite.
- Attach Main Line: Connect your long cotton thread to the bridle junction.
- Attach Tail: Tie your tail strips to the bottom corner of the kite.
Common Mistakes to Avoid
Even with the right materials, small errors can ground your kite. Watch out for these:
- Too Heavy: If the kite sits on the ground and won’t lift off, you have too much weight. Remove excess glue or switch to lighter spars.
- Uneven Spars: If one side of the kite bends more than the other, it will drift sideways. Check that your spars are straight and symmetrically placed.
- Weak Knots: Cotton thread slips easily. Use double knots or add a drop of super glue to the knot after tightening it.
- No Wind Check: Test your kite in gentle breeze first. If it struggles there, it will fail in strong wind. Adjust the bridle angle before taking it to a windy park.
Where to Find Cheap Materials
You rarely need to buy anything new. Check these spots in your home:
- Kitchen: Bamboo skewers, plastic wrap, aluminum foil (for patching), rubber bands.
- Laundry Room: Old t-shirts, ribbon trim, dryer lint sheets (surprisingly good for tails).
- Office: Printer paper, scissors, tape, staplers (useful for quick repairs).
- Garden: Twine, thin branches, leaves (for natural aesthetics).
Building a kite is less about perfection and more about experimentation. Each failure teaches you something about wind dynamics and material strength. Start simple, keep it light, and enjoy the process of making something fly.
What is the best material for a beginner's kite?
Plastic grocery bags are the best all-around material for beginners. They are lightweight, waterproof, and durable enough to withstand minor tears. Combine them with bamboo skewers for the frame and cotton thread for the line.
Do I need special glue to make a kite?
No. Paper tape works best for paper sails, and hot glue is sufficient for plastic or fabric. Avoid liquid white glue as it adds weight and takes too long to dry. Reinforce joints with extra layers of material instead of relying solely on adhesive.
Why does my kite spin out of control?
This usually happens when the kite lacks stability. Add a longer tail to increase drag. Also, check that your bridle strings are tied at equal lengths. Unequal bridle angles cause the kite to tilt and spin.
Can I use fishing line for a DIY kite?
You can, but it is risky. Fishing line is nearly invisible and can cause deep cuts if it snaps. For casual flying, cotton thread or thin nylon cord is safer and easier to manage. Only use fishing line if you are experienced and wear gloves.
How do I repair a torn kite sail?
Use a piece of the same material cut slightly larger than the hole. Apply paper tape or hot glue around the edges of the patch. For plastic sails, you can also use clear packing tape on both sides of the tear for a watertight seal.