How To Make A Kite Using Cotton
You can use cotton to make a kite. But it is more common for kite makers to use lightweight fabric combined with light materials. One of the aims of creating a DIY kite is to allow it to launch and fly. Using cotton for your DIY kites can be done, but if you want a more extended flight, you can use polyester or nylon.
Can You Use Cotton To Make A Kite?
How do I make my kite? What fabrics are best suited to my kite?
These could be questions lingering in your mind when making your kite. There’s no doubt that flying a kite together with your loved ones or close friends is a memorable experience. Heck! Even if you’re all alone, flying a kite is fun!
The clear blue skies above, the breeze of the sunny air, and waves of laughter at a distance make kite flying a rewarding and fulfilling experience. But what better way to make it more memorable? Make your kite!
Is It Simple?
Some say it’s simple as ABC, and others may interject and say it’s more like singing ABCs but backward. Regardless of what they say, making your kite and enabling it to conquer the skies are not just rewarding but a core memory to cherish.
That said, making your kite means curating quality materials to enable it to fly. Quality materials, more specifically lightweight fabric and body parts, resulting in good outcomes. It is mainly because looking for and using these materials ensures that your kite can be launched and fly high.
We did our best to follow the steps, and fortunately, the outcome of our kite was a success. Aside from following the steps, have these materials with you.
What We Used
Designing and building your kite takes time. Sometimes your kite’s performance depends on the materials you used to make it. Nevertheless, it doesn’t mean you’ll base your DIY kite on pure luck. It’s essential to curate and find quality materials when building a kite. That’s why we sourced the best materials for making our kite. Below are the lists of materials you can find.
Used Or Recycled Cotton Fabric
You want to save the costs of making your kite as much as possible. Therefore, using recyclable pieces of cotton from your used clothes or stocked fabric is preferable. In this case, you’ll approach your DIY kites in a sustainable and eco-friendly manner.
24 Inches Ribbon
The 24 inches ribbon serves as the tail of your kite; it stabilizes your kite’s flight on low to medium winds. You can use any color of ribbons of your preference.
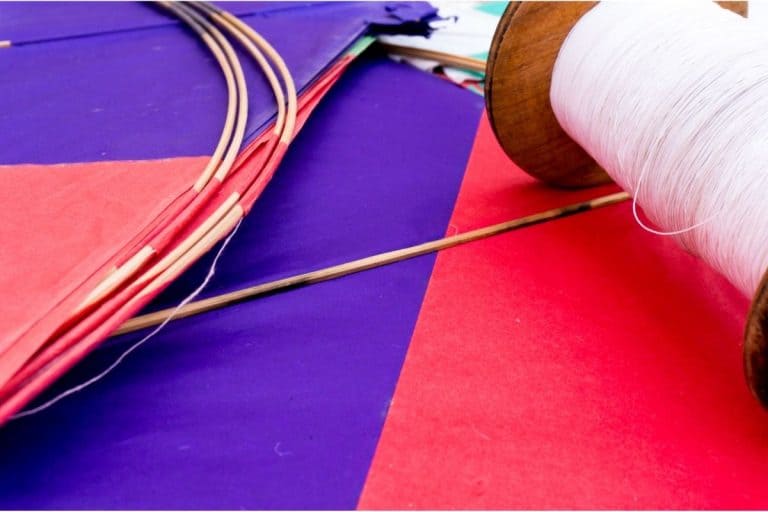
Wooden Spool
The wooden spools are the body or frame of your kite. It will ensure the kite maintains its flight by riding on the winds. Cute the wooden spools in about 20 inches (51 cm) and the other 24 inches (61 cm). The wooden spools will create a lowercase T-shape.
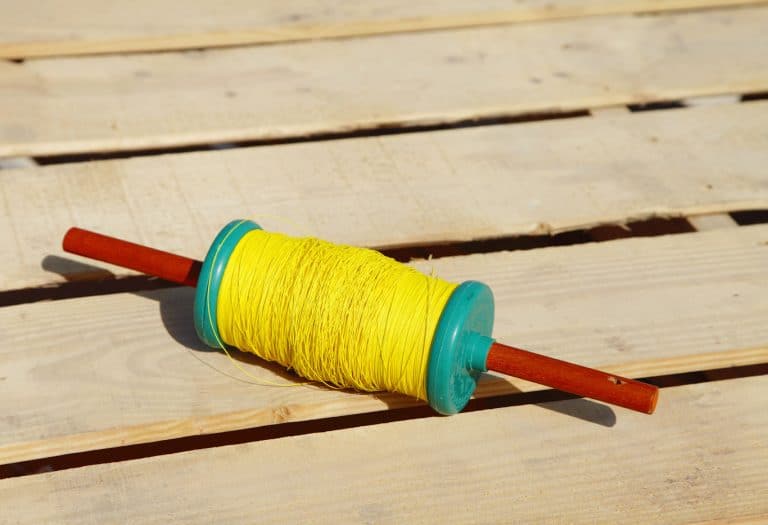
String Or Fishing Line
You can use any string or fishing lines to move your kite when in flight. The length of the kite solely depends on your liking. Aside from that, the strings or fishing lines serve as strings to attach the wooden spools.
School Glue Or Super Glue
Don’t forget to use strong or school glue to attach your cotton fabric to the kite’s frame.
Fabric Scissors
Using fabric scissors helps you cut through cotton with ease. Ordinary scissors would be hard to use in the cotton fabric due to the fabric weaves. So, find those sheer scissors in your grandma’s sewing kit!
Crafting Knife
This knife aids in cutting small notches on the base of your wooden spools or sticks. Using regular scissors can lead to accidents. That’s why make sure to use safety crafting knives for better handling.
Ruler Or Measuring Tape
There will be lots of measurements in the process. That being the case, you must ensure that all measurements are accurate to achieve excellent and favorable results.
Three To Four Wooden Dowels
You will only need two wooden dowels, or you can look for bamboo sticks with a thick width. You can find wooden dowels of different sizes on Amazon.
Pencil
Don’t forget to bring pencils to mark where you need to cut.

What We Did To Make Our DIY Diamond Kite
It’s more likely and evident that when you think of a kite, the traditional or diamond kite comes into your mind. There’s no shame in that! It’s because the classics are always majestic or whatever the saying is!
The classic diamond kite has four sides. More so, it is the easiest kite to fly among other classifications of kites. Therefore, making this kite is excellent for beginner kite fliers and at-home kite makers. However, where should you begin when creating your classic diamond kite. Here are the steps we took to make our kite!
Making The Base Or Frame
- Using Your Wooden Spools, Create A Lowercase T-Shape
Put across the 20 inches stick on the 24 inches spool, making lowercase T-shape spools. It is the body of your diamond kite. You can also make a larger kite using longer sticks based on your desire. Remember that the horizontal spool is shorter than the vertical spool.
- Attach The Two Wooden Spools
Once you put across the two spools while forming a lowercase T-shape, you can now use the fishing line or string to secure the sticks together. Make sure to wrap the yarn around the middle at least 2 to 3 times.
Then tie it with a small and secure knot and cut the excess string before the knot. To secure the hold of the line, you can dab a small amount of super glue or school glue on the string.
- Use A Crafting Knife To Cut Small Notches
Cut horizontal notches at the end of each stick or wooden spool. The notches should be horizontal or across the width of the stick. The deeper the notch, the better the strings will fit to attach the sail or fabric.
- Wrap The Strings On Each Notch
Now that you’re done with the notch thing, you can continue stretching and wrapping the lines around the frame. Loop the string at least 2 to 3 times on each notch at the end of the wooden spool.
Keep in mind to avoid cutting the string midway or while looping since the strings are where you’ll place your cotton fabric as a sail for your diamond kite.
If you’re done with the string looping, you can tie a small and secure knot at the last part of the loop process and cut the excess string.
Check the string if it’s firm but not too tight to distort the kite’s shape. The line and the sticks or wooden spool serve as the frame or base of the cotton sail.
Making the Sail
To this point, you’re moving to the exciting part. This time we’re going to cut the sail. So, ready your cotton fabric for the next step.
- Lay Down Your Cotton Fabric Smoothly
Make sure to clean your floors or tables when laying your cotton fabric. It’s vital to cut the sail accurately. You can use 40 inches (100 cm) wide cotton fabric for the sail. Also, this is where you can make your design before cutting the sail or use material with designs. In all honesty, it’s your choice! You can go crazy with the designs if it doesn’t affect your kite’s overall flight and performance.
- Get The Frame Of Your Kite And Lay It On The Cotton Fabric
Indeed, you have laid the material smoothly. Place the wooden frame with its perfectly looped string on the cotton fabric. Spread the frame flat in the center of the sail.
- Use Your Ruler Or Measuring Tape
It’s time to outline the kite using your ruler or measuring tape. Place the rules at the top of the body or frame. Do it at the end of each side of the stick or spool. Use your pencil to create a diamond line shape. At the end of the process, you should have made a diamond shape.
- Cut The Diamond Sail
When cutting the sail, you should cut it 2 inches (5.1 cm) wider than the lines. Use your fabric scissor to cut along the lines seamlessly. The 2 inches of space in the sail will help wrap the frames conveniently.
Putting Everything Together
You successfully assembled the frame and cut the sail. It’s now time to finalize all the parts by putting them together. Get your super glue, and let’s begin the pasting!
- Place Your Frame On The Cut Sail
Lay the frame flat out at the center of the sail fabric. Please ensure the shape is the same as the diamond before proceeding to paste it. You can use the outline as a guide.
- Fold The Edge Of The Fabric Over The Frame
Before folding the edges of the cotton fabric along with the frame, run a thin strip of glue. It will keep your material in place once you fold it over. Be sure that the edges are folded and pasted firmly.
You can use double-sided tape if you have no super or school glue. Allow the glue to dry over time and check if the fabric’s edges sit tightly over the frame.
- Attach The String
Use a 20 inches long string or fishing line to hook in the line for your classic diamond kite. Create a small opening where the two sticks meet. Stick through and pull one end of the flying line into the hole. Then tie it around the cross area of the stick.
- Tie The Ribbon At The End Of The Kite
The ribbon will be your kite’s tail. You can use the excess cotton fabric or the ribbon for the tail. You can cut them into 1.8 cm long pieces of a thick tail. Then loop the tail over the frame at least 2 to three times.
- Tie Long Pieces Of Ribbon To The Tail
Don’t forget to tie a ribbon at 1 foot per interval. You can use 2 inches long of ribbon to tie along with the ribbon. The cloth or ribbon strips will keep your kite in balance.
- You Can Now Try If The Kite Will Fly
Look for a vast place and make sure that there are no obstacles that will keep you from flying a kite. Check if the weather and wind are ideal and perfect for flying a kite.
Kite Flying Tip
Reduce your tail if your kite is flagging around and doesn’t launch. It would be best if you also tried tying another strip of ribbon or pieces of fabric along the width of the tail. It will give balance to your kite.
Reasons Why I Should Make My Own Kite Instead
Still not convinced that creating your kite is fun? Perhaps the reasons below can help you make up your mind.
Improves Problem-Solving
If you haven’t noticed by now, making your kite takes a lot of brain power and creative juices. Mainly because you have to measure and outline and make up your design that is to your liking. Apart from that, you need to consider a considerable amount of time applying physics when monitoring if your kite is flying with balance. Honestly, this requires a lot of working screws in our brains!
More Bonding With Family And Friends
Making your kite doesn’t mean doing it all alone—well, only if this is what you want. But you can also invite your family and friends to create their at-home diamond kite. You can use this activity to bond with your family or build relationships with your friends. It’s a promise that you will have lots of fun. You can also use this as a tight contest on who’s kite will fly!
Cost-Saving
While it’s true that there are affordable kites out there, not everyone can buy kites as they please. It may be that some are saving up for necessary expenses or other personal stuff that are more practical.
Therefore, crafting your at-home kite can give you more chances to save on essential matters. Also, it is more eco-friendly if you are using recycled materials!
Benefits Of Flying A Kite
While crafting your kite is challenging, there’s another thing to consider. There are also good benefits that you can reap from flying a kite.
Motor Skills
When flying a kite, it’s evident that you need many physical or motor skills to move along with the kite. Since you’re maximizing your physical activity, you’ll be able to generate motor skills. It is not just beneficial for kids but also for adults. In no time, you’ll be able to run and sprint without tripping!
Hand And Eye Coordination
Launching and running along the kite is slightly easy, but hand and eye coordination are challenging. The good thing about flying a kite is that you’ll be able to harness your skills to use your eyes to tell your hands what to do. In this case, you’ll be able to achieve that superhero-like reflex to respond to something urgently. Maybe throughout consistent kite-flying, you’ll be the great spiderman!
Exercise
Since you need to move around wide spaces, you’ll inevitably sweat a lot of the yummy food you ate yesterday. Aside from improving your cognition and coordination, kite flying can also be good for your physical health. It is a good substitute when going to the gym is daunting and overwhelming for you.
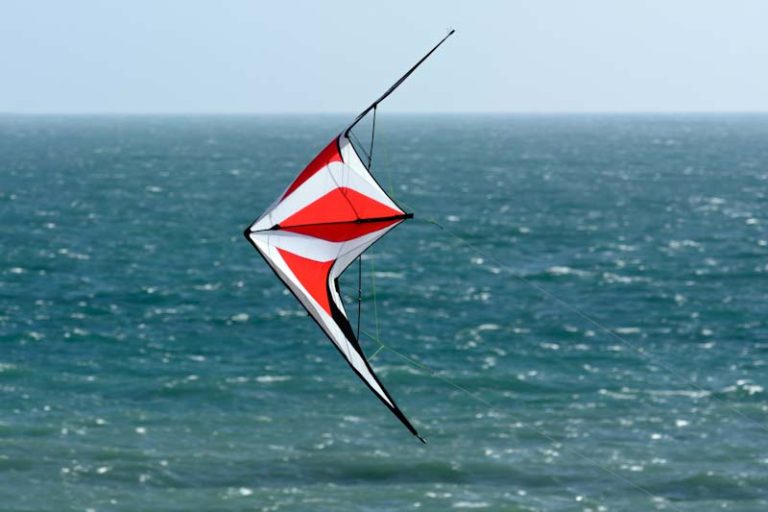
Boosts Creativity
It is an excellent time for you to channel your creative soul by designing your kite. You can start by making the classic diamond kites into more sophisticated ones like delta or barn door kites. You can paint extravagant and stunning illustrations that go with your kite. The possibilities are endless!
Makes You More Confident
After finishing making your at-home kite, you can test if it will fly. When you successfully launch and soar the kite above, your confidence will fly high! If you want to know why it’s because you overcome the challenges of creating and flying, then after, succeeding while doubting.
Building confidence is not just for children to learn but also for adults to harness along their adult journey. So, if you’re having difficulty being confident, perhaps making your diamond kite and testing its flight is an excellent start to the finish line.
Benefits Of Flying A Kite
You finally reached the end of the tutorial. Remember to follow these steps to create your classic diamond kite, and once you have successfully made your at-home traditional kite, you can try to test it out. Of course! We know you’ll not stop there! We can sense that you’ll be up to another challenge like making delta kites or maybe other types of kites? Who knows?
Did this tutorial help you? Like and share it with your buddies.