How Do You Make A Delta Kite At Home?
In windy areas, the Delta design for kites tends to be more efficient than other kite designs. A Delta Kite can glide well on the high and lofty altitudes-the main reason it is popular. A Delta Kite’s design is both efficient and adaptable.
If you have a standard flat kite at home, you’ll only have to make a few adjustments to turn it into a Delta Kite.
Delta Kites Are Known For Outperforming Flat Kites
The name ‘Delta Kite’ is from the fourth letter in the Greek alphabet. The said letter formed a triangular shape that inspired early inventors to use it as a name for the kite.
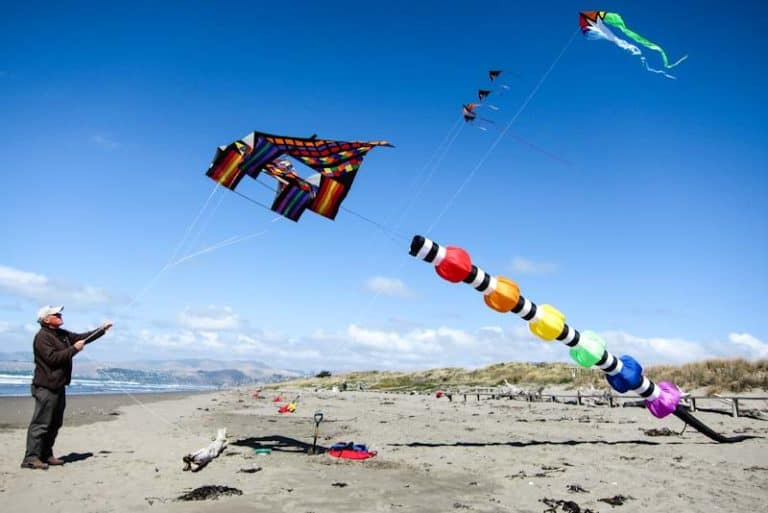
Delta Kites have a triangular shape formed by a spreader and harness lines. Some have tails that help drag the kites in solid winds. Aside from the easy setup, these kites can be made foldable for easy transport.
Most kite enthusiasts would recommend using Delta Kites, even for first-time users! The design allows a stable, accessible, and swift wonderful kite flying experience. The usual model of Delta Kites can fly for long periods. What contributes to more extended flight periods include both the wind and the warmth of the air.
Delta Kite Works Well In Various Wind Speeds
Sturman and Mcgowan 1996 explain that “The Delta Kite system can be flown in wind speeds ranging from 4 to 25ms-1”. Different wind conditions work well with various Delta Kite designs. Some Delta Kites with a light fin material work best on easy winds. (source)
You can also tweak a basic Delta Kite design by extending its towing point further. Your kite flying experience creates less pull in most wind conditions.
Delta Kites Are Among The Most Convenient Kites
This particular kite has a simple design setup, making it a perfect fit for those only starting to fly kites. It also helps for easy navigation. Delta Kites have a form that can catch even the slightest wind blow.
It is what makes it easy to keep it in the air. It is perfect to use for kite flying in valleys or plains.
Unlike other kite designs, Delta Kites flow almost parallel to the direction of the wind, which means more excellent stability and less effort are necessary for flying it. It is particularly one of the reasons why children are more inclined to use this type of kite. Delta Kinds has a unique design that is easy on the eye. The more a Delta Kite has a more extensive body, the more it can increase in its lift.
How Do You Fly a Triangle Kite?
The first thing you need to figure out is where you’re going to fly your kite. Find a place with only a few trees and power lines to avoid getting into trouble with your kite. Remember that kites can crash on electrical grids and can cause hazardous effects.
Consider the season of the year. You can’t expect much kite flying if there’s a lot of rain or snow. Try to observe the wind range you need for a better kiting experience.
Make yourself aware of the weather forecasts. Sudden rain or strong winds can make or break your kite flying experience. It’s best if you do not go if the wind is more than 20mph.
At least 6 out of 12 people get admitted during stormy weather because of kite-flying injuries. This incident usually happens in June, July, August, and September. (source)
If there’s also a storm coming, you should avoid going out to fly your kite. Electricity or lightning can strike your kite and can harm you.
Choosing Your Kite And Gears
Choose a kite that you can navigate well. Some kite fliers have difficulty controlling their kite because it’s too huge or too heavy. You can opt to use gloves that can help you grip your kite.
You can also use a release system so you don’t get dragged by your kite.
Make safety your priority. If your kite gets stuck on a power line, call professionals or the electricity company to come to get it for you. Some power lines have a high voltage of electricity flowing through it and can be lethal.
If you plan on having a child use a Delta Kite, find a place with little to no power posts to avoid accidents. A September 2014 study found that kite flying accidents are most common in children and adolescents. (source)
For instance, if your kite gets stuck on a tree, please do not attempt to throw things to set it loose. Don’t keep pulling hard; just let it fly loose so it can be free.
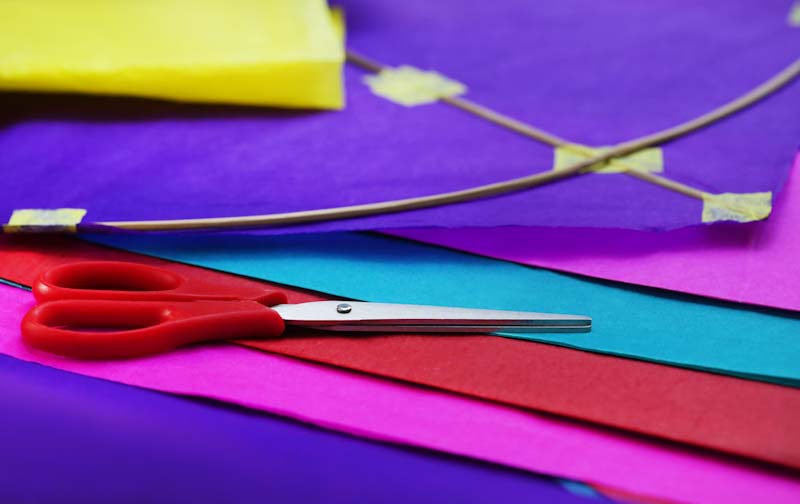
What Do You Need To Make A Delta Kite?
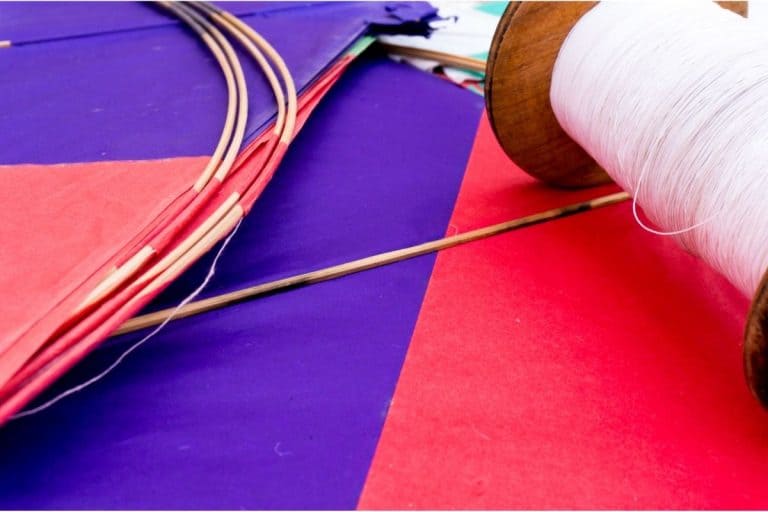
When building Delta Kites, you need to make your sail first. So you’ll need four dowels to make your Delta Kite. Your first two dowels should be longer than the other two dowels that you will use.
The typical size for dowels you can use for the longer ones can be around 36 inches and the shorter ones at 30 inches.
How Do You String A Delta Kite?
To put a string on your Delta Kite, position your kite with the sail facing upwards. As you do this, check to see if the bone part of your kite is facing downward.
Before connecting your string to your Delta Kite, ensure using the correct flying string.
If your string is too heavy, it can pull down your kite and add unnecessary weight. But if it’s too thin, you might not be able to control your kite as you intend to. Worse, it can easily break, and you can lose your kite.
Depending on the size of your Delta Kite, choose the string that will be best for it. Your kite string is equally as crucial as the kite itself.
For safety measures, you can make it a point to use a string that can conduct electricity the least. Metallic and glass powder-coated lines are what to avoid for your kite. Strings of these kinds cause most of the kite flying accidents in India. (source)
How To Put A String In Your Delta Kite?
To put a string on your Delta Kite, tie your harness to it. And then, measure your horizontal dowel and cut a line twice your dowel’s size.
Tie the ending of each string onto both sides of the horizontal dowel. You can add tape to make sure the knot sticks to the kite frame. The last step is to create a knot at the center of your bridle string.
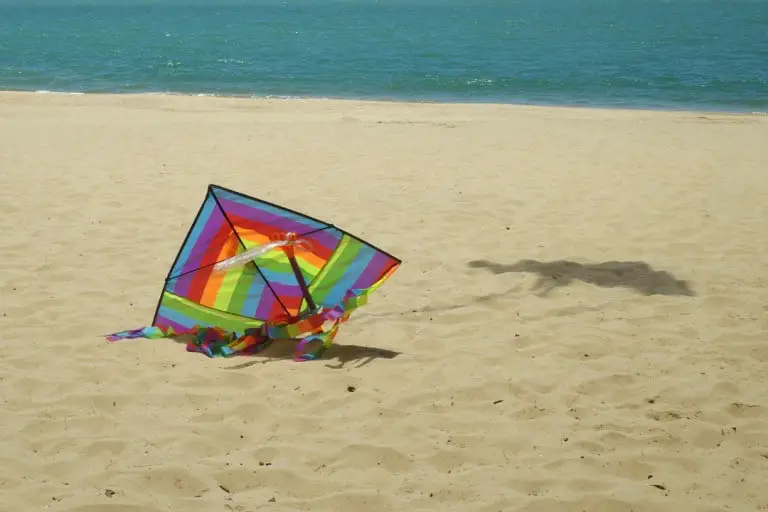
Some people would also add a tail on their Delta Kite. Once you’ve attached a string to your kite, it will be easy to add a tail should you decide to do so. Putting in a tail on your Delta Kite is not required, but some find that it helps in creating a more stable flight.
If you want to add a tail to your Delta Kite, you can use the leftover parts of your kite cloth for it. The preferred length of a kite’s bottom is for it to be at least thrice the vertical length of your kite.
Simple tie the tail to the bottom part of the vertical dowel of your kite and add tape so it will hold more firmly.
How Do You Build A Kite?
To build a kite, you first have to ensure that you have the proper materials.
Flying Line
First, you need the flying line. It is what you’re going to use to navigate your kite. The thickness you need for the string will vary on the size of your kite. A larger-sized kite will need a stronger kite string.
The line you choose is crucial to how your kite flying experience will turn out. You can either use nylon or Dacron. Some people resort to using Acrylic knitting yarn. However, yarn is thick for a kite string, so only use this if neither nylons nor Dacron is available.
Kite Body
For the body of your kite, you can use either a thin table cloth or two-ply plastic bags. Don’t use items that can easily break. It would be best if you had something sturdy enough to glide with the wind in the sky.
Another item that you’ll need is electrical insulation tape. Now electrical tape varies in color; choose what works best with the kite body color.
Firming The Kite’s Sail and Tail
Lastly, what you’re going to need is a hardwood dowel. You can use almost any type of wood for your Delta Kite. Most people use Tasmanian, Red, or White oak; these should work fine.
You can build a kite by cutting the cloth or plastic bags you want to use for your kite’s sail. Cut the material to your desired size, and then attach the dowels on the sides of the sail to make the shape firm.
The last step that you have to do is attach your kite’s tail. It is not required, though, but it can help you navigate your Delta Kite.
How Do You Make A Fancy Kite?
Determine The Kite Size
To make a fancy Delta Kite, you first have to determine the size of the sail you want. Find a surface where you can flatten your sail material and create markings for three dots of a triangle.
When you’ve created enough markings, cut the sail material according to the shape. After which, you can start attaching your dowel to your kite.
Attaching The Dowel
Make sure that the length of the dowels is the same as the sides of your triangle. It serves as the frame of your kite, so it has to be uniform in size.
Attach the dowel on both sides of the sail with the same length. Then, also attach a dowel to the centermost part of your kite.
Finally, attach another dowel across the two parallel sides of your Delta Kite. Use your electrical tape for the corners of your kite frame. Wrap it around the ends of the dowels, so they don’t fall off.
Choosing The String
Now is the time to take your chosen kite string. To attach your line to the kite, poke a small hole in the sail right at the center. You can make the hole right under the intersecting dowels at the center of your kite.
Insert the string on the hole and tie it around the vertical dowel. You can use electrical tape to secure the knot.
Tail Or No Tail
This next step is optional. You can either choose to attach a tail to your Delta Kite or not. But it is highly recommended that you do as it helps stabilize the kite in the air.
Take the remaining sail material you used and see if you can create a strip not over 2 inches wide for the kite tail. The tail should be at least three times the length of your sail.
Attach the tail of the kite to the bottom of the vertical dowel. Then use the electrical tape to secure the attachment.
Chinese Bird Kite’s Influence On Delta Kites
In 1940, an architect named Wilbur Green created the first kite in history. It did not take much time before the prototype caught the attention of many others. It launched the kite business back then.
The Gayla Brand became the top brand in the market for selling kites. The company sold handmade kites and dominated the business in the year 1957.
In 1961, businesses started branding the kites as Delta Kites. It was the same time that Mr. Green sold the company Gayla Kite and carried on to other ventures.
The Nantucket Kiteman
After two years, Al Hartig, a businessman, founded The Nantucket Kiteman. He had produced a new Delta Kite design inspired by the Gayla design and has called it the Valkyrie. It became the reason people started to create their versions of the kite, seeing that it was easy to do so.
Eleven years later, Kite Tales magazine published an article created by Bob Ingraham.
After 11 years, Bob Ingraham published a pivotal article in the Kite Tales Magazine. He wrote a step-by-step process on creating a high-performing Delta Kite, which is still used by many today.
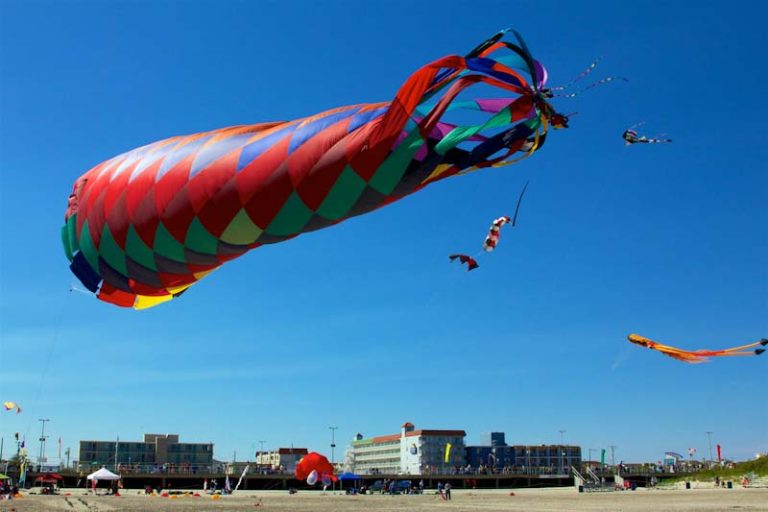
Delta Kites Nowadays Vary In A Lot Of Ways
A bit like clothing, Delta Kites vary in size. Depending on the size, a handler can navigate well. Research conducted in 2010 found that the larger the kite is, the more it was able to resist higher force. (source)
Varying Shaped And Sizes
Others have also started to design their kites bolder forms than natural triangles. You can find Delta Kites that have a shape more like a bat than a triangle.
There is also a version of Delta Kites today that does not use the usual word for the dowels. Some use either fiberglass or graphite for the frame of the kites. Kite sellers use this since the material is more lightweight than some wood.
Most Delta Kites also have tails attached to them despite being unnecessary. Kites with tails seem to appeal more to the public than tailless kites. It is why businesses that mass produce kites add tails to their products.
Varying Materials
Compared to the introductory kite sail used, Delta Kites today are made with ripstop nylon. Another material used for kites today is spinnaker cloth.
Since kites con synthetic materials, it’s inevitable for them to have noticeable effects on the environment.
When you lose track of your kite in the sky, it goes uncontrolled and lethal for some avian species. There have been some cases of birds dangling because of kite strings. It shows that there’s much more to consider than leisure when using a kite. (source)
If kite flying can harm humans, how much smaller are species in the environment. Kite flying is a great way to express one’s creativity and style.
Final Thoughts
Without a doubt, it is one of the most fulfilling hobbies humans practice. But all must be responsible for the effect these practices can do on the environment. One can easily make Delta Kites at home with a few simple materials.
You’ll find that you can quickly assemble Delta Kites as long as you follow the abovementioned steps. The materials for a Delta Kite are not that hard to find.
When flying your Delta Kite, you must be particular with the planned location. The environment you choose must be conducive for Kite Flying. You can try open grass fields with minimal electrical posts and aerial blockings.